
Immortals Fenyx Rising Observatory Constellation And Wing Piece Puzzle Guide
If you’re struggling with finding the Observatory Constellation and Wing Piece puzzle solutions in Immortals Fenyx Rising, check out our guide.
You Are Reading :Immortals Fenyx Rising Observatory Constellation And Wing Piece Puzzle Guide

The Observatory Constellation puzzle in Immortals Fenyx Rising is a mandatory puzzle you need to solve in order to obtain the Wing Piece for the Wings of Daidalos. This puzzle is drastically more difficult than any of the ones that come before it, primarily because it operates on a much larger scale – it’s like giving someone a ten-piece jigsaw, watching them do it, and then slamming a big 1,000-piecer down in front of them and saying, “There you go, have at it.”
Fortunately, we’ve solved the Wing Piece puzzle and jotted down the fastest and easiest way to do it. So, if you’re having a bit of trouble, look no further than our Immortals Fenyx Rising Observatory Constellation and Wing Piece puzzle solutions guide.
Immortals Fenyx Rising Observatory Constellation And Wing Piece Puzzle Guide
The Observatory Constellation puzzle is part of the Blurry Vision quest, although we’ve compiled this separate guide to explain it because it’s a lot more complex The One-Eyed Giant Vault of Tartaros.
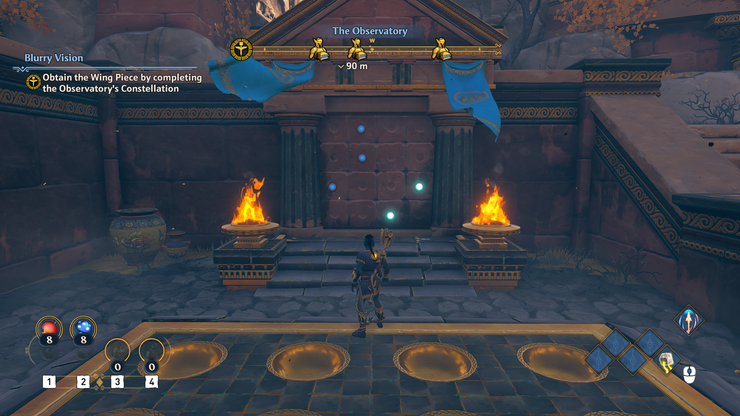
Essentially, once you pick up Aiolos’ Jar and are back in the normal world that isn’t Greek mythological hell, your next objective will be to collect the other Wing Piece by completing the Observatory Constellation. The location for this will be automatically highlighted by a quest marker on your minimap. Once you arrive at your destination, there will be a few harpies knocking about. Remember you can do upward burst attacks – something the tutorials don’t tell you – and easily defeat all of them in no time.

After you defeat the harpies, you’ll see the Wing Piece behind the red door, as indicated in the screenshot above. To open the red door, you’ll need to find five blue orbs to place in certain spots of the grid Fenyx is standing on. The pattern you need to copy is on the wall to the right of you if you’re facing the wings from the position in the screenshot above. It looks like this.
One of the orbs is already in the puzzle in one of the correct slots, but you need to find the other four yourself. Also, you can’t just smash the boulders next to you and use the smaller rocks as substitutes – that might work with weighted panels, but this grid requires the proper blue orbs.
For the first orb, go up the stairs to the right of the puzzle and you will see a red door in front of you to the right. Face the door, turn around, and you will see another platform with torches on each side. Walk over, stand on the panel, and use Apollo’s Arrow to guide an arrow through the fire and towards the unlit torch that was unlocked by applying pressure to the panel you’re standing on. This will unlock the door and allow you to collect the second orb, which you can place into another slot of the grid (obviously make sure it’s in one of the spots that corresponds to the blue circles in the solution on the wall).
Head back up the same stairs as before, but turn left this time, past the lever in the middle of the path and past the rubble at the end of it. You will see a large gated structure with two orbs inside.
OK, so this next part is a bit more complex. Go back to the lever you walked past and pull it, before quickly running up to the platforms to the left of the rubble in order to clamber over the wall and bypass the red door, making your way into the gated structure. The gate will close behind you, but that’s not an issue. Pick up the first blue orb and place it into the circular panel next to its pedestal. This will open the doors back towards where the lever is – leave the blue orb in the pedestal and grab the second one in the room next to it. Bring this one the whole way out to the lever, then go back to collect the first orb – you need to bring the second one back first if you want to get both of them out through the gates. Once you’ve successfully snagged both of them, head down the stairs and add them to the grid in the correct slots.
The last orb is actually on the lower platform, so don’t go up the stairs again. Make your way down from where the Wing Piece is and you will find another gated building. Go around to the right-hand side of the building and Fenyx will say, “The wall is crumbling, I wonder if there’s a way I can break through it.” From here, pick up one of the small boulders next to you and use a charged throw to smash through the broken part of the wall. When you go inside, push the cube the orb is on into the gap behind it and the orb will drop. Pick it up and bring it to the grid to slot it into the last open place. This will cause a black portal to open, which will reward you with two Coins of Charon. Once you take them, the red door hiding the Wing Pieces will disappear. Take the Wing Piece and a brief cutscene will play, revealing that the Observatory was built by Daidalos himself. Once you have the complete Wings of Daidalos, head up to meet the stranger at the top of the Observatory – the location will be highlighted by a quest marker.
A cutscene will play when you arrive at the top. Typhon will appear and you will learn that the thief is Hermes, who will help you harness the power of Aiolos’ Jar and the Wings of Daidalos to push Typhon back. After the next cutscene, glide off the top of the Observatory down to the ground below, finishing the quest with a fresh new pair of wings.
Link Source : https://www.thegamer.com/immortals-fenyx-rising-observatory-constellation-wing-piece-puzzle-solution/