
Contrast: Act Two Walkthrough
Table of Contents
The second act of Contrast sees Dawn and Didi working to fix a disaster of a circus. If you’re stuck, we can help!
You Are Reading :Contrast Act Two Walkthrough

Act 1 is a fairly quick and easy introduction to Contrast. Act 2 adds more challenges and new techniques you’ll need to master to succeed. As you traverse Johnny’s circus, there might be a few obstacles that have you scratching your head.
If getting the circus attractions back online is proving to be a challenge, this spoiler-free guide will take you through Act 2 step-by-step. By the time you’re finished, you’ll be ready for the game’s third and final act.
Off To The Circus

Act 2 begins back in Didi’s room, sometime after the events of Act 1. Approach the phonograph to trigger a cutscene where Didi brings you up to speed on what’s happened since your last adventure.
When Didi opens the bedroom door, go out into the hall and speak to her near the portrait of her parents. Head downstairs to trigger another cutscene, then follow Didi outside.
In front of the apartment, Didi will teach you a new ability, the Shadow Dash. This allows Dawn to move through thin shadows while shifted by dashing forward. Use the new technique to cross the chasm via shadows.
After the first section, you’ll need to temporarily shift out to light up the next section and continue.

Near the end of the chasm, you’ll need to jump and Shadow Dash in midair to get through the last barrier. Once you shift back, follow Didi into the circus tent.
After listening to the conversation between Johnny and Vincenzo, walk to the other side of the tent and look behind the curtain for a Collectible and a Luminary that you’ll need later. Once you have them, follow Didi to the main area of Act 2.
You’ll need to repair the three attractions that Vincenzo mentioned – the puppet show, the hot-air balloon, and the pirate ship. You can do them in any order, but we’ve presented these sub-objectives in our preferred route. Once all three attractions are fixed, return to the main tent to conclude Act 2.
Act 2 has several odd pop-culture anachronisms. The game takes place in 1923, but during the puppet show, Didi references Mary Poppins. The first Mary Poppins novel was published in 1934, and the movie – which Didi specifically mentions – wasn’t released until 1964. When boarding the roller coaster, she says “second star on the right and straight on till morning.” While the original Peter Pan play was published in 1904, the famous direction to Neverland was created for the 1953 Disney adaptation. After defeating the kraken, Didi says, “say good-night, Gracie”; this is a reference to The George Burns and Gracie Allen Show, which aired on television from 1950 to 1958 and always ended with that phrase. Can Didi see the future?
How To Repair The Puppet Show

From the circus tent, walk straight ahead towards the pirate ship and turn right at the bottom of the stairs. At the end of the path, you’ll see the Chiaroscuro Theater and a glowing film reel. Go inside the tent and walk to the back. A cutscene will trigger; after Johnny finishes talking, pick up the Princess Hat on the left side of the stage. Shift into the spotlight to begin the puppet show.
During the puppet show performance, Shadow Dash is disabled. You’ll have to rely on Dawn’s regular running speed and precise jumps to get through some trickier portions.
The Ogre’s Forest

Listen to Johnny’s prelude (or skip it) and wait for the stage to change from the castle to the forest. Walk to the right and jump over the spike pit, then climb over the trees on the far side.

When you reach the windmill, stand on the right side of it and jump onto a blade to ride up counter-clockwise, jumping onto the trees nearby once you’re high enough.

At the crocodiles, time your jumps so that you only land on the crocodiles when their mouths are closed. The distance between the third and fourth crocodiles is wider than the others – your jump will need to be precise. If you clear the crocodiles on your first try, you’ll receive the “Just Like Harry” achievement.

At the magic mushrooms, start by jumping on the rightmost mushroom. Wait 2-3 seconds, then jump on the center mushroom. Do not jump on the leftmost mushroom. If you trigger it by accident, wait by the right-hand mushroom for the branches to reset. Stand on the end of the branch that extends. When the right mushroom expires, it will lift you to the top of the tree. Use the opposite branch to jump across the pit.

When you reach the ogre, stand on the stump until he prepares to swing his club. You want the spike in the ogre’s club to get stuck in the stump. When the ogre swings, run to the left – if the spike gets caught, use it to climb over the ogre’s back to the other side.

Stand by the tree and wait for the ogre to prepare another attack. The ogre will thrust his club towards you – jump straight up to land on it. As the tree begins to fall, jump back to the other side of the ogre and stand on the left side of the stump to keep it from being crushed. Once the ogre is defeated, Johnny will reset the stage for the next scene.
The Spider’s Cave

As before, run to the right after Johnny’s prelude at the castle. Jump onto the first platform and use it to clear the wall, then use the next platform to cross the chasm.
At the uncrossable spike pit, wait for the conversation between Johnny and Didi to end. When the chest onstage opens, shift out of the shadows to pick up the umbrella.

Shift back into the shadows to continue the story, then jump into the spike pit. Thanks to the umbrella, you’ll begin falling slowly – navigate so that you don’t touch any obstacles. Hitting a wall here will break the umbrella, forcing to you restart the floating sequence. If this happens, you will need to pick up the umbrella again before returning to the shadows.

Shortly after you see Fred and the spider, you’ll have no choice but the land in a spiderweb. Press the jump button a few times to untangle yourself from the web, then continue to the right. A boulder will begin rolling after you. Keep moving right to avoid getting crushed. You’ll encounter two more webs – run into them and immediately break them by repeatedly pressing jump. After the second web, you’ll drop off a small ledge. Hide underneath it and allow the boulder to pass over you.

After the boulder crashes, use it to climb over the wall. On the other side, you’ll be pursued by the spider Keep running and avoid the webs as much as you can to prevent it from catching up. You can afford to get caught in one web at most if you’re quick.
- Go over the first platform to avoid the web beneath.
- Stay on the ground level to avoid the second web.
- After climbing the tall wall, drop straight down and jump over the web from ground level – if you try to jump from on top of the wall you’re likely to land in the web.
- Jump over the next two webs as you run.

You’ll reach a rock chimney leading upward – jump back and forth between the platforms, zigzagging upwards while staying ahead of the spider. Once you reach the top, use the center platform to jump into the webs on the ceiling. Break both webs to drop the boulder on the spider. It’s best to break the right web first, then the left. After the spider’s demise, rocks will fall from the right to clear your path forward – you’ll want to be on the left so that you don’t get crushed.
Continue to the right and break the web holding Fred. Johnny will return you to the castle for the next scene.
The Dragon’s Mountain

Once Johnny resets the stage after his narration, keep moving to the right. Jump over the first two chasms, then proceed slowly. A boulder will appear in front of you – turn around and jump back across the chasm. When the boulder falls into the chasm, continue to the right.

You’ll arrive at a teetering rock pushed up by geysers. You should be able to jump to it regardless of its position, but you’ll need the right side to be at its highest to reach the next platform.

At the next obstacle, look for the spot where the ground shakes and stand on it. Ride the geyser up and use it to reach the top of the wall. On the other side, you’ll see more geyser spouts as you proceed – stand on the second one to ride the geyser up just as a boulder passes underneath.

Continue to the right, and you’ll enter the dragon’s lair. Stand in front of the dragon until its head moves, then jump to the left side of the rock. The dragon’s fire will break one of the ropes holding Fred. Repeat this three times without touching the dragon’s fire to complete the sequence.
After an epilogue from Johnny, the puppet show concludes, and you can return to fixing the other attractions.
How To Repair The Hot-Air Balloon

Leave the Chiaroscuro Theater and take the path to your left. If you’re going straight from the main tent, go as far to the right as you can and down the stairs. Both paths will bring you to the carousel.
Approach Didi by the carousel controls, and you’ll discover that it requires 2 Luminaries for power. One Luminary is just past the carousel – you can see it from where Didi is standing. Use it and the Luminary you picked up in the main tent to restore power to the carousel.

Once the Luminaries are placed in the carousel’s control panel, Didi will turn it on, projecting the shadows of horses on the surrounding walls. You can climb onto them from the wall just to the right of the controls – when a horse reaches its lowest point, shadow shift onto the wall to catch a ride.

Run to the right (the opposite direction from which the horses are moving), jumping from horse to horse as needed. When you come to a barrier, carefully Shadow Dash through it so that you land on the rooftop with the Luminary.
Pick up the Luminary, then jump toward the ad for Kat’s show and shadow shift into it. There is a shadow platform at the bottom of the ad, so you don’t need to time your jump to land on a horse. Continue jumping along the horses to reach the next balcony – pay attention to the altitude of the horses to make your jumps easier.
At the balcony, Didi will create a bridge for you to cross the next gap. Once you’ve crossed with Didi’s help, shift out of the shadows and pick up the Luminary. Jump onto the roof of the carousel and activate the beacon in the center. This will cause more shadows to be projected, letting you climb higher.

Go back to the balcony and shadow shift onto the wall, riding the new shadows that have appeared. This sequence is easiest if you ride one of the shooting stars – their long tails make it easier to Shadow Dash through obstacles. Stand at the rear of a shooting star and Shadow Dash at the last moment. You’ll end up at the front of your shooting star without overshooting.
When you return to the ad for Kat’s show, jump on top of it. You will automatically shift out of the shadows. Climb up the ledge on the far side of the platform. Pick up the Luminary, then shadow shift onto the far wall, using the shadows of the banners to cross. Shadow Dash through any obstacles you encounter until you reach the next balcony.
Shift onto the next wall, timing your advance so that you can jump over an approaching star. When you approach two stars together, jump and Shadow Dash through the barrier between them.

You’ll reach the rooftop where the balloon is tangled. Before releasing it, go to the right to find a rooftop patio. Pick up the bottle on the table to earn the achievement “The Cyclops’ Bottle.” There is also a Luminary under the stairs on the far side of the patio that will become inaccessible after you retrieve the balloon, so grab it now while you have the chance.
Once you’re done on the roof, go up the stairs to where the balloon is stuck and interact with it. Didi will haul it in from the ground, returning you to the plaza near the main tent.
How To Repair The Pirate Ship
From the main tent, go straight downhill to the boardwalk where you’ll find the pirate ship attraction, Tortuga’s Revenge. Go through the attraction’s main entrance to trigger a cutscene. Didi points out that the switch for the gangway is on the ship and inaccessible from the ground.
Go down the ramp against the sky backdrop, and you’ll find a large crate. Dawn can carry it and even bring it with her when she shadow shifts, but carrying the crate disables jumping.

Bring the crate to the top of the ramp and shift into the backdrop with it. Put the crate down on the right side of the backdrop and climb on top of it. Jump up, then shift out at the height of your jump to grab the ledge above.
After pulling yourself up from the ledge, press the button to activate the gangway and let Didi board the ship.
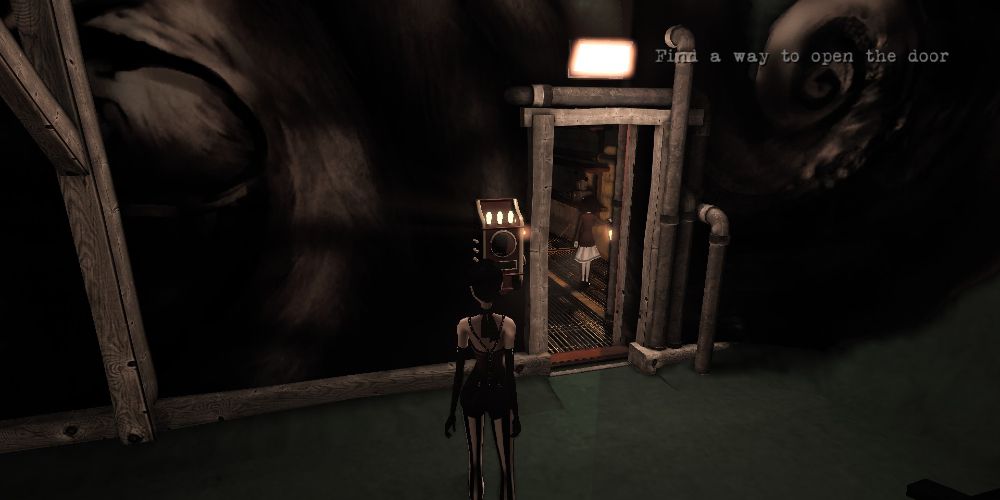
How To Open The Gate
Follow Didi to the main deck, where a gate blocks your way. You’ll need to activate three switches simultaneously to open the gate – look for square glass plates on the floor with gears underneath.
Pick up the nearby box and drop it on the red plate near the ship’s wheel. Next, go back down the gangplank and pick up the original crate you used to reach the ship, which will have shifted back when the lights went out. Carry it to the right side of the compartment containing the wheel and shift it through the door. Drop the crate on the purple plate to open the second part of the gate.

Interact with the wheel and wind it up by holding it down until it won’t go further. While the wheel is slowly rotating back to its original position, return to the main deck. Go to the left side of the backdrop and shift into the wall, allowing the wheel’s shadow to carry you up and over to where the green plate sits. Before you proceed, jump to the platform on your left and use it to get on top of a wheel spoke at the eleven o’clock position. This will allow you to jump and shift out to catch a ledge, pulling you up to where the third crate waits. There is also a Luminary hidden above the wheel compartment that you can reach from here.

Pick up the crate and shift onto the backdrop, riding a spoke to the right side. Once there, drop the crate on the green plate.
When all three switches are held down by crates, the gate will open allowing Didi to pass through. On the other side, pick up the Luminary to your right then interact with the cart to ride the roller coaster with Didi.
How To Repair The Roller Coaster
After the cutscene, a piece of kraken scenery will block the track, forcing you to get out and fix the ride. Look to your left for a wooden bridge leading upwards, and follow it until you find a button. Press it to cause the ship’s cannon to fire, damaging the scenery and giving you a shadow to walk on.
As you descend back down the bridge, look for a large treasure chest near the bottom. Its lid will open and close – while it’s open, jump into it to earn the achievement “No Backpack Bird Needed.”

Back at ground level, you’ll see a pile of crates near a moving tentacle prop. Stand on the crates and wait for the tentacle to come down. When it does, jump straight up and shift to land on the tentacle’s shadow. Ride the shadow about midway up, then jump to the left to land on the platform near the cannonball’s resting place.
Walk past the cannonball and open the door on the far side of the room, then pick up the cannonball and shift onto the wall to cross the rope shadow back to the button. Watch out for the tentacle shadow, as it can knock you off of the rope if your timing isn’t right.

Back at the button, shift into the wall with the cannonball, and walk up the ramp to drop it underneath the crane. Shift out of the shadows and press the button to fire the cannon again, removing the obstacle on the tracks.
Return to Didi and interact with the cart to continue onward. At the next stop, jump down underneath the tracks and pick up the cannonball there. Carry it up the ramp and proceed along the pathway counter-clockwise to reach the upper level.

Put the cannonball down when you reach the switch and use it to slightly raise the shadow against the far wall. You’re looking for a small bump to appear in the middle. Once the shadows are positioned, pick the cannonball back up and shift onto the wall at the end of the pathway. Drop the cannonball on the left side of the bump and return to the switch.
Raise the shadow so the cannonball is on the same level as the platform in the upper left, then return to pick it up – you’ll now need to jump while shifted to reach it. Carry the cannonball to the platform with the cannon, grab the Luminary on the far side, then put the cannonball into the cannon to trigger a cutscene.
Meet Didi under the tracks and place three Luminaries in the box next to the service exit. You should have them if you’ve been grabbing them at every opportunity, especially if you did the hot-air balloon sequence before entering the pirate ship. Once the door is open, follow Didi through.
How To Reset The Pirate Ship Attraction
Walk with Didi down the stairs and across to the generator room. She will point out two levers that need to be pulled at the same time. Approach the lever on the left-hand side and wait for Didi to count down from three. After she says, “3…2…1…Go!” immediately activate the lever to turn the ride back on.
Link Source : https://www.thegamer.com/contrast-act-two-walkthrough/