
Destiny 2: Seraph Bunker Guide
Table of Contents
Season of the Worthy brings Seraph Bunkers, the new progression activity. Here’s everything you need to know about how they work and what they do.
You Are Reading :Destiny 2 Seraph Bunker Guide

Seraph Bunkers represent the seasonal progression centerpiece for Destiny 2: Season of The Worthy. There are a number of activities associated with the Seraph Bunkers, including a new public event and a new type of Lost Sector: Legendary Lost Sectors. The bunkers themselves have a daily challenge and, most importantly, offer weapons and permanent seasonal enhancements on a tiered upgrade system.
The Seraph Bunkers share a lot in common with last season’s Obelisks, but they are also different in a number of ways. Here’s a guide to using the Seraph Bunkers: what Seraph Bunkers are for, how to farm upgrade materials, and tips for making the most efficient progress on the Seraph Bunkers throughout the Season of the Worthy.
What Are Seraph Bunkers?
The first Seraph Bunker will open in the EDZ simply by following the seasonal quest chain that begins by speaking with Zavala. Zavala will send you to meet with Ana Bray on Mars, who will send you on a quest to gather orbs of light before meeting with Rasputin, the Warmind. Finally, Rasputin will send you to the EDZ and open the first of at least 3 Seraph Bunkers.

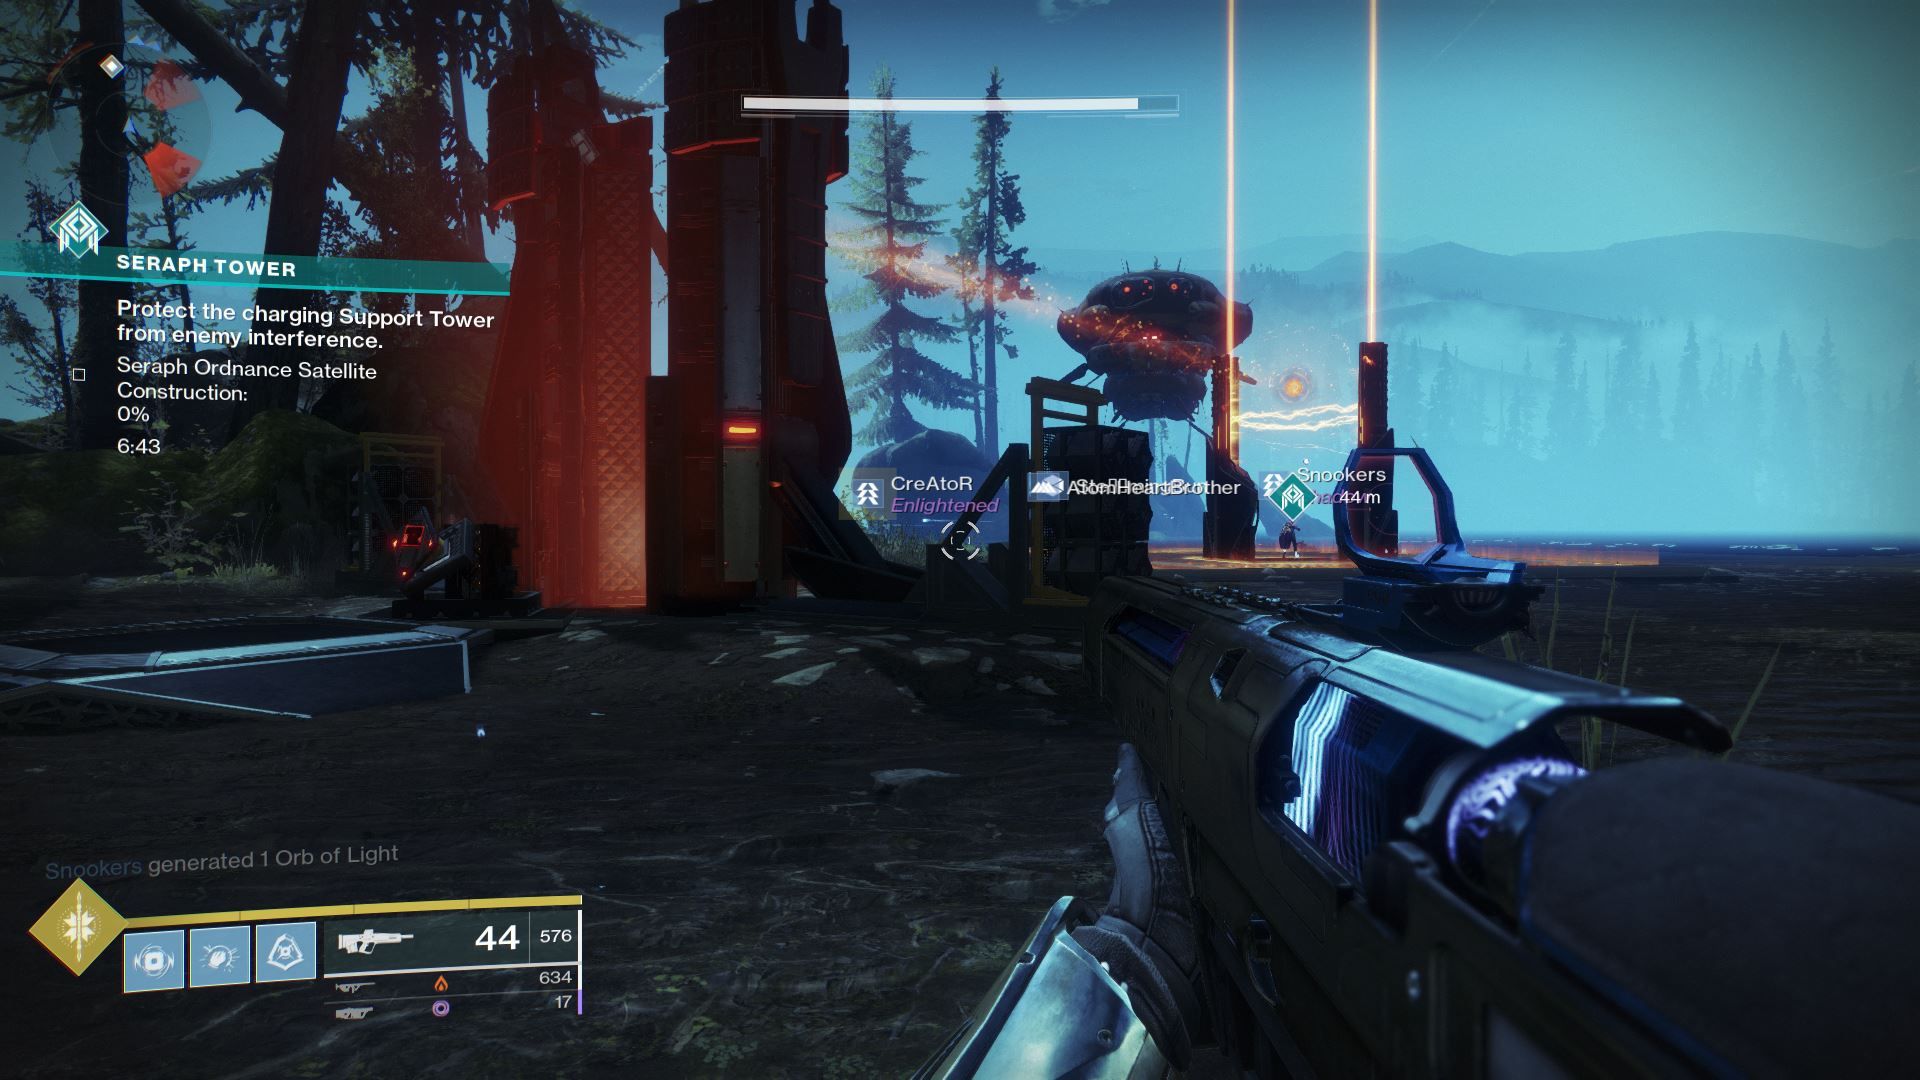
When you enter the EDZ Seraph Bunker, you’ll find Zavala and Ana Bray in the middle of an assault by The Fallen. Clear the bunker out as you would a Lost Sector to complete the mission and earn some Warmind Bits. This mission is repeatable daily and will need to be completed in order to earn valuable Warmind Bits and chipsets. Once the other bunkers become available the bunker under attack will rotate, but for now, remember to clear on the EDZ Seraph Bunker of enemies each day.
Once you clear out the bunker you’ll have access to the vendor, Rasputin. Rasputin has weekly, daily, and repeatable bounties, as well as bunker upgrades, weapon frames, and upgrade bonuses.
How To Upgrade Seraph Bunkers
In order to earn stronger defenses for season activities, seasonal weapons (called Seventh Seraph weapons), and ultimately, save the last city from certain doom, you’ll need to upgrade all of the Seraph Bunkers. Seraph Bunker upgrades are a loop that feeds back into itself through the acquisition of 2 types of currency: Warmind Bits and Chipsets.

Warmind Bits are the Fractaline of this season. They are rewarded from a variety of different activities and are used to purchase upgrades from Seraph Bunkers. At first, the only way to earn Warmind Bits is by completing the Seraph Tower public event, clearing out the bunker, completing the new Legendary Lost Sector, and turning in Rasputin bounties.
Rasputin offers 2 weekly, 5 daily, and a repeatable bounty to help you rack up some early Warmind Bits. Weeklies reward 50, while dailies and repeatable bounties reward 10. The Seraph Tower public event rewards 10 Warmind Bits for a completion, but only 4 for a failed attempt. The Legendary Lost Sector offers more, but at a recommended power level of 1000, it’s likely you won’t be completing this challenge right off the bat.

Each bunker has 3 upgrade triers containing 7 upgrades each. Each time you purchase a tier 1 upgrade (using 100 Warmind Bits, 12 Dusklight Shards, and 6 legendary shards) you are rewarded with 1 EDZ Chipset.
Chipsets are then turned into Rasputin as you would planetary material to a regular vendor. Conveniently, it costs 7 EDZ Chipset to upgrade the EDZ Seraph Bunker from Tier 1 to Tier 2. Upon upgrading to the next tier you’ll receive a Seventh Seraph weapon, a permanent tier bonus, and access to a new tier of upgrades as well as new weapon frame bounties.

You can continue to upgrade the tier of each bunker beyond tier 3, the maximum tier for upgrades, by purchasing Chipset packages for 500 Warmind Bits, 5 Legendary Shards, and 5,000 Glimmer.
How To Farm For Warmind Bits
Starting out, bounties are your best bet for earning Warmind Bits. Purchase all the Rasputin bounties you can and make sure you complete all of the daily and repeatable bounties you fit in your quest log. Between these bounties and the Seraph Tower public event, it shouldn’t take long to earn the 100 you need for your upgrades.
To be as efficient as possible, the second upgrade you purchase (since they force you to purchase the Valkerie for your first upgrade) should be the very last one, which reduces the Warmind Bit cost of upgrades from 100 to 75.
Next, grab the upgrade that causes playlist activities to reward Warmind Bits. This way, you can continue to earn bits and make progress on your bunkers when playing Strikes, Crucible, and Gambit. You won’t receive Warmind Bits in every activity, but every little bit helps.
As you continue to unlock more upgrades and earn levels on your season track, you’ll unlock more ways to earn Warmind Bits more efficiently. By the time the next Seraph Bunker opens on the Moon (in a few weeks) you should able to earn Warmind Bits at a much more reasonable pace.
As long as you clear out the bunker each day and complete all of the daily, weekly, and repeatable bounties, you’ll have no problem earning enough Warmind Bits to power up the bunkers and save humanity from this season existential threat: The Almighty.
Link Source : https://www.thegamer.com/destiny-2-seraph-bunker-guide/