
Dicey Dungeons: Tips For Playing Each Class
Table of Contents
If you’re just starting out in Dicey Dungeons, this guide will help you get the hang of each dicey class.
You Are Reading :Dicey Dungeons Tips For Playing Each Class

Quick Links
Dicey Dungeons may seem like a simple game of using dice to take down enemies, but it’s a lot more complex than you might think. You have five available classes – plus a sixth hidden one – to choose from that each have different mechanics that affect how your dice are used to slay baddies in Lady Luck’s dungeon. Not only do they all have different move sets, but they also have individual limit breaks that drastically alter how these turn-based battles play out.
As you switch between these classes, you’ll have to constantly change your strategies and tactics to make it to the end of a run. To make things a bit easier, this guide will lay out some tips and tricks on how to lead each of these dungeon-crawling dice to victory and maybe even freedom.
The Warrior

The first class you have access to is The Warrior. As his name suggests, he’s all about doing big damage. He’s the most straightforward character to play as he doesn’t feature any bizarre or unique gameplay mechanics. All you need to do is smack your enemies as hard as possible.
His special ability allows him to reroll any of his dice up to 3 times during a turn. A lot of The Warrior’s moves rely on higher value dice to inflict serious damage on his enemies. So if you have some ones or twos, it’s not a bad idea to reroll them to see if you can improve your damage output. Since you always have this ability, you don’t necessarily need to take any of the moves that alter a die’s value such as Bump or Spatula.
His limit break is called Fury, which lets you perform your next move twice. This means that can you double up on one of your powerful attacks to make it twice as deadly. You should pair this limit break with your most hard-hitting attacks, such as Battle Axe, Broadsword, Hammer, and especially Crystal Sword. In fact, if you can obtain Crystal Sword, you should attempt to use your limit break with it whenever you can. It’s a piece of equipment that can only be used once per battle, but you can slot a five die into it to do 3x damage. Performing Fury with this can allow you to do up to 30 damage in a single move, which can one-shot some enemies.
The Thief

Despite being the second class that you can unlock, The Thief can be one of those most difficult dice to play as. His early moves don’t allow you to do much damage, so it takes a while for him to become effective.
As you might expect with a thief, this class is all about stealing equipment from your enemies. Each turn, The Thief will swipe a different attack from the enemy you’re facing. Sometimes this will work out well, but other times it may mean that you’re using an attack that your opponent is strong against which reduces its effectiveness.
The Thief’s limit break is called Unlucky Roll and will immediately grant you four extra dice that are all ones. While this may not seem like much, a lot of The Thief’s equipment is dependent upon low-value dice and countdowns. An attack like Poison Needle can’t be used with dice higher than two. Since it has three uses, that means you could use those ones to add three poison damage to an enemy. Finding moves where those extra ones can be utilized is the key to success.
Since this class has a lot of moves that have countdowns, consider upgrading the Crowbar as soon as you can. This will reduce the countdowns, which could potentially make multiple attacks pop off at once.
While heading down the floors, if you see an enemy called The Alchemist, attack her as soon as you can. There’s a solid chance that you’ll steal a move from her called Bear Potion, which will turn you into a bear for the rest of the run. Being a bear gives you powerful attacks that can be upgraded to become even powerful. Plus you get a new limit break called Bear Smash that does 10 damage. You won’t be able to buy anything at the shops since you’re now a wild animal, but the various NPCs will have amusing reactions to your new bear form.
The Robot

This is the first class that offers a drastically different twist on Dicey Dungeon’s formula. Instead of being given dice, The Robot has an ability called Calculate that gives you a randomly generated die. This ability has a meter attached to it called a CPU Counter that will increase in value until it hits a target or goes over it.
For example, if the target is nine and Calculate generates a six and a three, you hit the target and will get a jackpot that will let you use one of three special moves for free. However, if you go over the target, the CPU Counter will error out, which means you can’t get any more dice or use any more moves. This will effectively end your turn.
This class’ limit break is called Autoroll and is tied to the CPU Counter. It will automatically bring the Counter to a jackpot and give you random dice. It’s smart to use this at the beginning of your turn so you can guarantee a jackpot. Otherwise, you’re better off just using Calculate to get more dice.
When you hit level 2, you’ll get the choice of either taking the Buster Sword or the Ultima Weapon. No matter which one of these moves you choose, it’s likely going to be the best attack in your arsenal. The Buster Sword is immune to errors, which means that even if you go over the CPU Counter target you’ll still be able to use this attack. The Ultima Weapon will do double damage when you hit a jackpot. So it depends on how you play The Robot. If you find yourself going over the CPU Counter a lot, the Buster Sword is a safe option. But if you’re feeling lucky and want to do major damage, take the Ultima Weapon. Either way, upgrade whichever of these moves you take as soon as possible.
The Inventor

The Inventor is a frustrating class to play with. Every time you defeat an enemy, one piece of your equipment is scrapped and turned into a gadget. So if you have a Broadsword, it can be broken up and turned into the Plasma Gun gadget. Or if you have a Healing Crystal, it will be turned into the Regenerate gadget. These gadgets can be used without needing a die during your turn, but they only last for one battle before being replaced with a new one.
The most important thing to keep in mind with The Inventor is not to rush into battles. Since a piece of equipment is always destroyed at the end of your previous fight, this means there will be an empty slot in your current loadout. Always make sure to go into your equipment menu and equip something to replace what was just removed. Luckily, levels during your run as The Inventor tend to have more treasure chests, so you should be able to gather up plenty of new gear.
The Inventor’s limit break is called Focus and it will turn all of your dice into sixes. This means that The Inventor can do some serious damage if you have moves like Flamethrower or Six Shooter equipped. With that in mind, you typically want to avoid scrapping your most powerful weapons. You don’t want to run into a situation where all the equipment you have does low damage or no damage at all. Non-damaging moves like Duplicate or Hookshot are better options to be turned into gadgets.
If you can find a copy of a move you like, it might be a good idea to take it so you’ll have a spare if it has to be destroyed. Or you can equip a move you don’t care for so you can destroy it at the end and turn it into a useful ability. This class requires a lot more resource management than the others, so keep a close eye on your equipment.
The Witch

This class may be the trickiest to get the hang of. The Witch has a spellbook where each spell corresponds to a numbered die. A one will initially cast Cauldron, a two will cast Infliction, and so on from there. Unlike the other classes, you can only have six pieces of equipment – or spells in this case – in total. If you hit that limit and want to add a new spell, you have to discard one that’s currently equipped.
Each time you get a new spell, you place it in your spellbook and decide what number you’ll need to prepare it. When you use a die to prepare a spell, it gets placed in a spell slot. You have four active spell slots and you can use copies of the same spell. For example, if you used a two to prepare Infliction, you would then place it in one of your active spell slots. That two would be depleted and you could now use another die to cast Infliction. Once cast, the spell can’t be used again until your next turn unless you decide to put another spell in its place.
This is definitely not an easy character since it requires careful planning and strategizing. Since casting a spell uses dice, you run out of dice a lot quicker. You definitely want to find spells that can increase the amount of dice you can get such as Hall Of Mirrors or Duplicate. Spells that can alter die values like Doppeldice or Magic Key can also be very handy when you need a different numbered die than the one you have. The Witch’s limit break, Crystal Ball, will roll you three extra dice. If you can, save that for the beginning of a battle so you can do a ton of damage right from the start.
Many of The Witch’s attacks require even or odd-numbered dice to perform them. Make sure you place the spell on a number that’s the opposite of what you need so you don’t prepare a spell and then not have the die to cast it. If a spell needs an even number, put it on one, three, or five. If a spell needs an odd number, place it on two, four, or six. If a spell needs a specific numbered die, place it on a different number. Hall Of Mirrors needs a six, so you’ll want to put it on any of the other numbers.
As you level up, you’ll have the option to take prepared spell slots or upgraded spell slots. You actually begin your run with one prepared slot. These slots allow you to always have a specific spell ready to use at the start of your turn and you can select which one of your spells you want in these slots from the equipment menu. Upgraded slots let you use an enhanced version of whatever spell is placed in that slot during battle. You’ll eventually get to fill up all of your spell slots with either of these options as you level up, so it’s a good idea to have two of each. That way you always have your two best spells ready to go and two extra spell slots are there to be upgraded. Make sure to switch up your prepared spells between battles as some spells will be better suited to have at the start depending on what enemy you’re fighting.
The Witch also has an odd ability where she can throw dice at enemies to do 1 damage per die. So if all else fails, you can toss your dice at the enemy and hope that will kill them.
The Jester
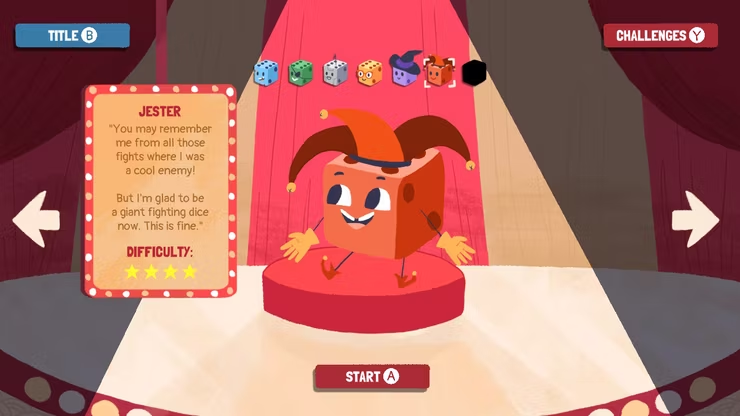
Finally, there’s The Jester, who is the secret unlockable character (although since you’re reading this, he’s probably not so secret anymore.) His gameplay mechanic turns his move set into a deck of cards. You get three cards in your hand at the start of your turn. Each time you use one, another card is drawn to replace it. His ability allows you to discard any duplicates of cards in your hand that you don’t want.
As for his limit break, it’s called Snap! and it allows you to instantly play any pairs or trios of cards in your hand. So if you have two Boop or Bop cards, you can activate Snap! and play both of them without using any dice. This means that the best strategy for playing The Jester is to gather up as many pairs of cards as you can find. The more duplicates you have the more deadly this class becomes.
There’s no limit to the amount of cards you can have in your deck, which can be a good and bad thing. You’ll gather up a lot of cards, but not all of them will be useful. It can be a good idea to get rid of some cards if they’re disrupting the flow of your turns. You’ll usually be given the option to destroy cards at one of the shops. This is a good way to make your deck more manageable.
One of The Jester’s major downsides is the low amount of dice they tend to have. Try to find cards that give you extra dice, alter your dice, or give your dice back after they’ve been used. If you utilize your dice efficiently, it’s possible to go through every card in your deck and demolish enemies in a single turn.
Link Source : https://www.thegamer.com/dicey-dungeons-tips-for-playing-each-class/