
New Pokemon Snap: Every Request In Lental Seafloor Undersea & How To Complete Them
Table of Contents
With its multiple branching routes and 15 LenTalk photo requests, Lental Seafloor Undersea is one of the most complicated courses in New Pokemon Snap.
You Are Reading :New Pokemon Snap Every Request In Lental Seafloor Undersea & How To Complete Them
Category : Pokemon

With multiple branching routes and 27 different types of Pokemon for players to find, the Lental Seafloor Undersea course is one of the most complicated in New Pokemon Snap. Its 15 LenTalk requests don’t help much in this regard either, with many of them requiring players to manipulate multiple Pokemon in order to get the exact shot that they need.
To make matters worse, a few of these requests can only be completed at lower research levels due to the ever-changing nature of the course, so players will likely need to account for this as they’re gearing up to tackle them. Despite their difficulty, however, some of the requests found throughout the course are up there with the very best in New Pokemon Snap and so should provide players with some genuine fun as well as the inevitable frustration.
Favorite Hangout Spot Request Guide

Before players can tackle the Favorite Hangout Spot request, they’ll first need to reach research level 3 for the course. After doing so, they should start up the course as usual and make their way to the point where the Clawitzer destroys the bolder to open up the alternate route to the undersea depths. Rather than taking it though, they should instead wait until just after they have passed the tunnel and then turn around.
They’ll now see two Luvdisc cuddled up with a Corsola on the backside of a nearby rock and will need to capture a picture of the sleeping Pokemon to fulfill Todd’s request. Corsola should be the focal point of the photograph, although players can also get a three star photo of Luvdisc at the same time if they still haven’t found one for their Photodex.
Swimming Clamperl Request Guide

Players won’t be able to complete the Swimming Clamperl request until after they have unlocked the course’s first alternate route at research level 2. Once they have, they’ll need to follow it until they reach the bottom of the deep tunnel and then look for a Clamperl buried in the sand. There are a few of them in the area and it doesn’t really matter which one players choose, although it helps if there’s a Lumineon close by.
After finding a suitable target, the next step is to throw a Fluffruit as close to the Clamperl as possible and then wait for the Lumineon to dig it up. At this point, the Clamperl will begin swimming away and players will need to snap a photo of it as it does. It will be a four star photo and just needs to be handed in at the end of the run to fulfill the request.
Lucky Four-Leaf Clover Request Guide

The Lucky Four-Leaf Clover request can be completed once players have unlocked pink Illumina Orbs by photographing the glowing Frillish. They’ll then need to follow the default route and make their way to the tunnel which the NEO-ONE travels up through on its way to the exit. There’ll be a Crystabloom directly in front of them as they enter, but this one will only attract two Luvdisc when illuminated. As a result, they’ll instead need to turn around and look for another Crystabloom a little higher up.
Once they’ve located it, they’ll need to throw an Illumina Orb at it and then wait a few moments for four Luvdisc to gather around it. When they’re all in position, it’s simply a case of using the Melody Player to get them to arrange themselves in a clover shape and taking a picture after they do. The resulting four star photo is all that’s needed to complete Rita’s request.
A Ring of Bubbles Request Guide

The setup for the A Ring of Bubbles request takes place at the very beginning of the course at research level 3. Players will need to throw an Illumina Orb at the Alomomola that’s directly in front of their starting position and another one at the nearest Luvdisc. If all goes to plan, the two Pokemon will move closer together and start facing each other. As soon as this happens, it’s time to get the camera ready.
The Alomomola will begin blowing a huge circular bubble around the Luvdisc and players will need to get a shot with the bubble ring clearly visible. Alomomola should be the subject of the photo, but Luvdisc will need to be somewhere in the shot as well. As well as fulfilling Todd’s request, the picture will also count as a four star photo and so can be incredibly useful for filling the Pokemon’s Photodex entry.
A New Way to Dance Request Guide

After players have reached research level 2, Cradily will start showing up in the reeds just past the entrance to the undersea cave as well as in the ancient ruins section on the alternate route. There isn’t a specific one that needs to be used for the A New Way to Dance request, although the ones in the reeds are perhaps a little easier due to the better visibility and their close proximity to the start of the course.
In the event that the Cradily that the player chooses is asleep, they’ll first need to wake it by hitting it with a Fluffruit. Once it’s awake, they’ll then need to hit it with an Illumina Orb and wait for it to extend its neck a little. When it does, using the Melody Player will cause it to start dancing and capturing the moment on camera will reward players with an easy four star photo as well as fulfilling the requirements for Rita’s request.
Stirring Up Starmie Request Guide

The Stirring Up Starmie request can only be completed at research level 3 in the tunnel between the deep crater and the ancient ruins. Players will need to look down in the sand beneath them and try and find a red gem buried in the sand. There are a few of them to choose from, although as with the Swimming Clamperl request, it helps to choose one with a Lumineon nearby.
With a suitable Starmie located, the next step is to throw a Fluffruit on the ground as close to the red gem as possible. After a moment or two, Lumineon will swim over and begin spinning and, as it does, the Starmie will be uncovered. Players can get a three star photo of Starmie here, although the photo that they need to complete the request is of Luminion as it starts to spin.
See Ya Inf-later! Request Guide

The See Ya Inf-later! request is a very easy one to miss, as it can only be completed at research level 1 and won’t show up on LenTalk until after players have completed their first run of the course. As a result, most players will need to lower their research level by hitting X on the course select screen and then choosing research level 1 before they’ll be able to complete it.
From here, they’ll need to follow the default route as usual until they’ve passed the area with the Wailmer. They’ll soon find themselves in an underwater cavern with a few Quilfish and should use the Melody Player as soon as they are in range of one. It will puff itself up to around double its normal size, at which point hitting it with a Fluffruit will cause it to rapidly deflate and begin zooming around the cave. It all happens pretty quickly, so it helps to take a wide shot of the action rather than trying to zoom in and risk missing it.
Ready, Aim, Fire! Request Guide

The Ready, Aim, Fire! request is another one that’s easy to miss. It takes place at research level 2 in the same area as Phil’s See Ya Inf-later! request, so players may need to lower their research level accordingly on the course select screen before they can take it on. They’ll also need to act quickly, as there’s only a short window of time in which the conditions for the request can be met.
As soon as they enter the cavern, players will see a Clawitzer hovering close to the ground directly in front of them. They’ll need to hit it with an Illumina Orb, but only when it starts moving. If timed correctly, it will still be glowing when it fires its projectiles at the other Clawitzer that’s nearby and, providing both Pokemon are in the shot, this will be enough to fulfill the request. There are other opportunities to get a shot of it firing its projectile, but getting both Pokemon in the frame is almost impossible, so it’s best if players get the shot they need on the first time of asking. On the plus side though, it will at least count as a four star photo of Clawitzer.
Undersea Ballroom Dancing Request Guide

Players will once again need to be playing at research level 2 if they want to fulfill Phil’s Undersea Ballroom Dancing request. They’ll also need to hit the Clawitzer near the start of the course so that it opens up the alternate route and then follow this through the green room into the deep tunnel that players travel downward through. There are three Tentacruel here and players will need to identify the male one. It usually starts out on the player’s right, but it’s best to hover the reticule over it and check for the ♂ sign before proceeding just in case.
After finding the right one, players should hit it with Illumina Orbs until it does a little spin and then continue on as usual. It’s worth noting that hitting either of the female Tentacruel with Illumina Orbs here will prevent players from completing the request. Upon arrival in the ancient ruins section, they should now see the male Tentacruel with a Frillish near the Crystabloom on the stone platform and using the Melody Player will cause the pair to start dancing. Players will need to get a four star shot of the Tentacruel to complete the request, but can also get a two star photo of Frillish at the same time if they don’t have one already.
A Sunlit Cave Request Guide

Although players will be able to see the titular cave at research level 3, they will only be able to complete the A Sunlit Cave request while playing at research level 2. This means hitting the X button on the course select screen for those who’ve already reached level 3 or max level and then hitting the Clawitzer near the start of the course with an Illumina Orb again to gain access to the alternate route.
Immediately after entering the green cave, players will see a group of Chinchou swimming in front of them, but they should ignore these and instead look for one beneath them and to their left. They’ll be able to tell it apart from the others as it’s the only one swimming in a straight line. They’ll then need to hit this Chinchou with an Illumina Orb as quickly as possible before turning their attention to the sunlit cave on their left. If they made the shot in time, the Chinchou will turn up and start summoning three of its friends. If players wait for all four to gather they’ll get a four star photo, while a shot of three or fewer will only be classed as three star. Either will be sufficient for completing the request though.
A Light in the Depths Request Guide

At research level 3, players will encounter a Lanturn in the deep tunnel that they travel downwards through on the alternate route. It shows up just after the Sharpedo attacks the Lumineon near the Crystabloom and players will need to hit it with an Illumina Orb before it swims away. After doing so, it will begin to swim downwards as a swarm of other Pokemon swim up. As soon as the Wailord has passed, players will again need to look around for the Lanturn, which is now being held by two Frillish.
They’ll need to quickly throw another Illumina Orb at it and then get a photo of the moment that it breaks free from their grasp. Getting a photo of the Lanturn a little later on while it’s on the sea floor will also be good enough to complete the A Light in the Depths request, although this will only count as a three star photo while the shot of it escaping from Frillish is classed as four star. If players haven’t already done so, now would also be a good time to complete the Seafloor Roar request for Todd.
A Seven-Colored Glow Request Guide

While playing the course at research level 3, players will be able to find several Starmie buried in the sand at the bottom of the deep tunnel on the alternate route. If they haven’t already done so, they should get Lumineon to dig one up by throwing a Fluffruit near the red gem to complete the Stirring up Starmie request. If they’ve fulfilled it already though, it’s much faster and easier to just throw an Illumina Orb directly at the gem. There are two or three Starmie that can be awakened this way, but players will only need one of them for the A Seven-Colored Glow request.
After this, players should continue on into the ancient ruins section and then illuminate the Crystabloom on the stone platform to their left. This will make a Starmie swim over and, once it has done so, players will need to illuminate the Crystabloom again to make the Pokemon perform the required four star pose.
To the Bottom of the Sea Request Guide

To complete the To the Bottom of the Sea request, players will need to be playing at research level 3 and following the course’s default route. When they arrive at the area just past the reeds with the Wailmer, they’ll want to start throwing Fluffruit at the Alomomola that are swimming slightly beneath the whale type Pokemon. Their target is the one that’s slightly in front of the other, although it doesn’t matter if players hit them both providing, so it’s best to do so just to make sure.
If successful, the stricken Alomomola will veer off at the last second and swim into the cave in which players photographed the glowing Frillish earlier on. Once there, it will stop and wait for the Frillish to come out and players will need to quickly hit it with another Fluffruit or two so that Frillish gives it a big hug. Players should get a photo that’s focused on Frillish during this hug to complete the request, but can also snap a three star photo of Alomomola for their Photodex at the same time if needed.
Golisopod Training Request Guide

At research level 3, a group of Clawitzer will start showing up in the ancient ruins section at the end of the alternate route. If players watch them closely, however, they’ll notice that one swims away from the others and stops for a moment near a stationary Golisopod. When it does so, players should quickly throw an Illumina Orb at the Clawitzer which will make it fire projectiles at Golisopod and wake it up. It’s not required, but capturing the moment on camera can be an easy way to get a good three star photo of Clawitzer.
After the Golisopod wakes up, it will slowly make its way over to one of the other Golisopod and the two Pokemon will begin sparring. Players will need to take a photo of one of them attacking the other to complete the Golisopod Training request, which should track as a four star photo. If needed, players can repeat this process to get a three star photo of Golisopod by getting a shot of the moments just before the pair begin sparring.
Seafloor Roar Request Guide
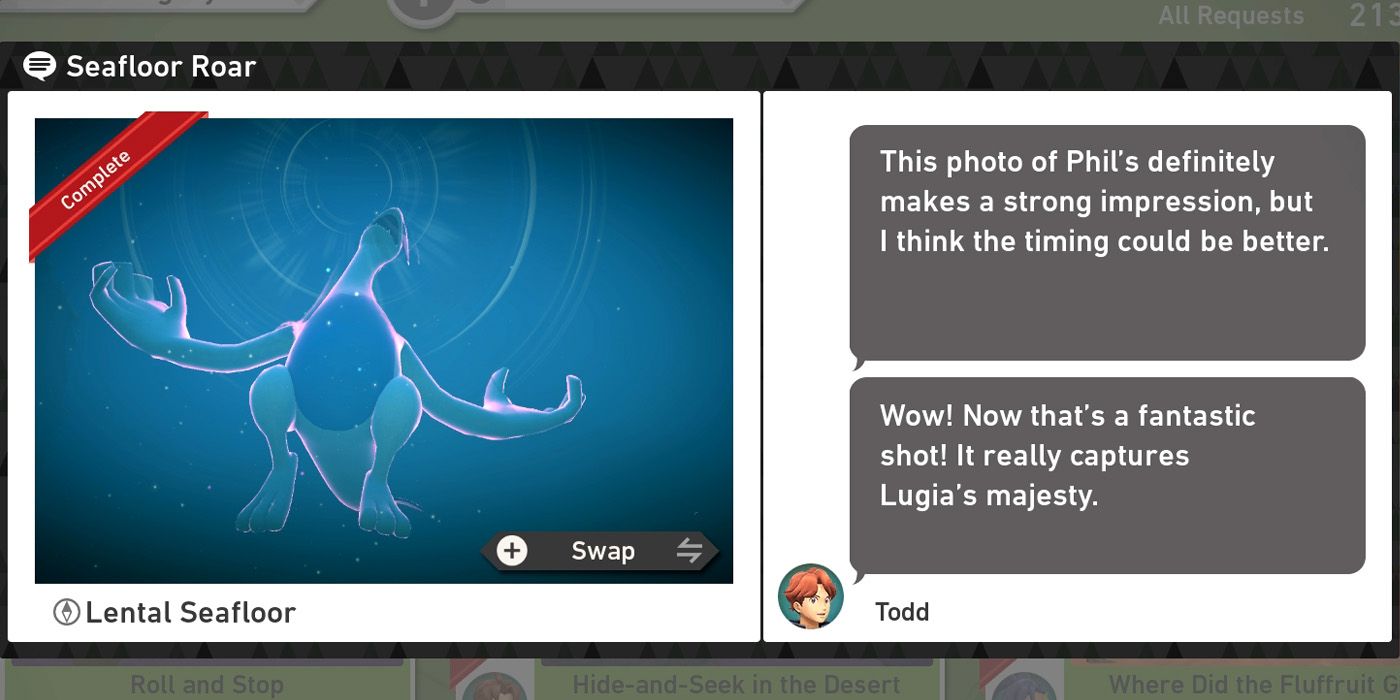
Players will only be able to tackle the Seafloor Roar request at research level 3 and will also need the help of a very brave Lanturn to do so. They’ll find the latter in the deep tunnel on the alternate route and will need to hit it with an Illumina Orb so that it starts swimming downwards. Shortly after, a Wailord swims past and players will again have to illuminate the Lanturn to free it from the two Frillish that are holding it. This will cause it to continue down to the seafloor depths and guide the NEO-ONE to the entrance of Lugia’s den in the process.
Players should now get a prompt to use scan and doing so will take them inside where they’ll find a sleeping Lugia. They’ll next need to illuminate the two Crystabloom to wake it (one is behind Lugia and the other is in front of it) and then follow it into the ancient ruins section. Here, they’ll need to keep an eye out for Lugia swimming towards them from the right side of the area and begin rapidly throwing Fluffruit as it approaches. Hitting it twice will cause it to turn around and hover near the platform with the Crystabloom on it before finally treating players to its almighty roar. A photograph of it roaring is all that’s needed to complete Todd’s request.
See more : PokemonWe