
New Pokemon Snap: Every Request In Shiver Snowfields (Day) & How To Complete Them
Table of Contents
Completing the 17 photo requests on offer in New Pokemon Snap’s Shiver Snowfields (Day) course provides both fun and frustration in equal measures.
You Are Reading :New Pokemon Snap Every Request In Shiver Snowfields (Day) & How To Complete Them
Category : Pokemon
 & How To Complete Them")
Seeing all that there is to see in New Pokemon Snap’s Shiver Snowfields (Day) course is going to take a lot of time and patience. There are multiple branching routes (one of which must be unlocked in the nighttime version of the course) as well as a ridiculous amount of Pokemon to find hiding out in the snow. On top of all this, there are no fewer than 17 LenTalk photo requests for players to complete on behalf of Professor Mirror and the rest of the research team.
Most of these requests can only be completed once players have reached research level 3 and they’ll also need to have unlocked both of the course’s alternate routes before they can complete them all. There are a couple that can only be completed at research level 2 though, which can make figuring out how to fulfill their requirements a bit of a nightmare for those who’ve already reached research level 3 or max level. For as frustrating as this all can be though, there’s also a lot of fun to be had figuring everything out and seeing all of the unique Pokemon interactions that the course has to offer.
Frolicking Furret Request Guide
 & How To Complete Them")
The Frolicking Furret request is a fairly easy one to complete, although players will need to wait until after they have reached research level 2 before they can take a crack at it. The setup takes place right at the start of the course, with players simply needing to hit the Crystabloom near the first snow wall with an Illumina Orb to make a nearby Furret jump out of its hole and dive into another one over to the left.
Once this happens, players will then need to throw a Fluffruit into the hole that the Furret dived into so that it sticks its head out and then use the Melody Player to make it perform a little dance. Taking a picture of this moment is all that’s needed for players to complete Rita’s request. If players want a four star photo, however, they can hit the Furret at the start of the course with a Fluffruit before beginning the process which will make both of the Furret show up at the second hole.
Snowfield Hide-and-Seek Request Guide
 & How To Complete Them")
In order to complete Rita’s Snowfield Hide-and-Seek request, players will need to be playing the course on research level 3. When doing so, the Beartic at the start of the course will be searching for its missing cub and players will need to help the Pokemon to find it in order to get the picture that they need. Thankfully, all it takes to do so is a well-placed Fluffruit.
Shortly after beginning the course, players will see a pile of snow to their left and performing a scan of the area will reveal three question marks on top of it. They’ll then need to throw a Fluffruit at the spot in the center of this snow pile in order to make the missing Cubchoo poke its head out and then snap a photo of it peering out to fulfill the request.
Duel on the Snowfields Request Guide
 & How To Complete Them")
Players will need to have unlocked both of the course’s alternate routes to fulfill the Duel on the Snowfields request and will also need to be playing the course at research level 2. Once these conditions have been met, they’ll need to pass through both of the snow walls and make their way to the frosty shore where they’ll find a Beartic chasing a Dewgong.
As soon as they’re able, they should throw a Fluffruit at the Beartic to make it angry, which will cause it to approach the player. As it does so, it will get distracted by a nearby Mamoswine and let out an almighty roar. Players just need to get a shot of this moment and then turn it in to the Professor to complete Phil’s request.
Message from a Friend Request Guide
 & How To Complete Them")
Once players have reached research level 3, they will see a Weavile running around in the starting area looking at trees. Performing a scan will get its attention though and players can then use Fluffruit to lure it over towards the area at the bottom of the steep hill. If it gets distracted or starts eating the Fluffruit, performing another scan will recapture its attention and players can continue guiding it towards the hill.
When it gets close enough, the Weavile will run over towards a tree with some scratch marks on it near the first snow wall and players will need to hit the tree with an Illumina Orb so that the scratch marks light up. If done correctly, the Weavile will stop to read them and players can snap a three star photo as it does so to complete the A Message from a Friend request.
Dig Here, Swinub! Request Guide
 & How To Complete Them")
The Dig, Here, Swinub! request is another that can only be completed at research level 3. Players should make their way towards the default exit and, upon arriving in the final area after the cave, look for a Swinub over to their left. After locating it, they’ll need to use Fluffruit to lure the Swinub over towards the Crystabloom behind it.
Once the Pokemon is relatively close, players should illuminate the Crystabloom with an Illumina Orb. If done correctly, the Swinub will move to a spot slightly to its right and then get shot into the air by a water geyser. Capturing the moment on camera will not only complete the Professor’s request, but also provide players with a nice four star photo of Swinub for their Photodex.
The Wrath of Mamoswine Request Guide
 & How To Complete Them")
In order to complete the The Wrath of the Mamoswine request for Phil, players must first complete the steps required for the A Message From a Friend request. This means guiding the Weavile in the starting area over towards the tree with the scratches on it near the first snow wall and then hitting the scratch marks with an Illumina Orb so that the Weavile reads them and then scurries away.
At this point, players should head up the steep hill as usual and then look for a Swinub over to their left when they arrive at the top. Hitting it with a Fluffruit will cause it to run away towards the Mamoswine and the two nearby Weavile will give chase. Players should then hit both of the Weavile with Illumina Orbs so that they get into a fight with Mamoswine and then photograph Mamoswine’s attack for the four star photo that’s needed to fulfill the request requirements. Players can also get a four star photo of Weavile too by getting a shot of its opening attack.
Skarmory’s Flying Show Request Guide
 & How To Complete Them")
Although players can complete the Skarmory’s Flying Show request from research level 1 onward, it’s far easier to wait until both alternate routes have been unlocked before attempting to do so. The request requires players to get a shot of Skarmory spinning in midair, which does happen on the default route near the Mamoswine at the top of the steep hill, but is very easily missed. With this in mind, players should instead head towards the alternate exit on the frosty shoreline to get the shot that they need.
Right before the exit, they’ll see a big hole in the wall to their left and, providing players didn’t scare the Vanilluxe in the icy cave a little earlier on, throwing a Fluffruit into this hole will cause Skarmory to emerge. After it flies out, it will perform a mid-air spin over the water to the right and players should photograph it as it does. A wide shot will do just fine for the request, making this an incredibly easy way of completing it.
Find that Perfect Timing Request Guide
 & How To Complete Them")
From research level 2 onward, Alolan Sandslash will begin to appear on the piles of snow to the left of the player’s starting position. It won’t hang around for long though, with the Pokemon quickly diving headfirst into the snow beneath it. This is the shot that players need to capture to complete the Find that Perfect Timing request, although there’s arguably a much better location to take it.
After passing through the first snow wall, performing scans in certain locations will cause Alolan Sandslash to repeatedly appear and then dive back into the snow. As a result, players can continue to use scan while they’re in the blizzard area until they get the shot that they need for Rita’s request. If they want a four star photo of the Pokemon, they can throw Illumina Orbs at the ground beneath the snow pile on which the Snom appear in the In the Blizzard request to make Alolan Sandslash appear and then feed it a Fluffruit, although it’s important to note that this won’t count towards the request.
In the Blizzard Request Guide
 & How To Complete Them")
Although players will be able to get some of the Snom needed for the In the Blizzard request to show up at research level 2, they won’t be able to get all four until research level 3. They’ll need to pass through the first snow wall into the blizzard area and photograph the three nearby Snom. One is on the floor to the left immediately after passing through the snow wall, another is on the floor in the back right corner and the final one is on the left side of the second tree from the right. If players are having trouble spotting them due to their small size and the poor visibility, scanning the area can help a lot here.
After photographing the three Snom, players will then need to illuminate the nearby Crystabloom and photograph the Frosmoth that shows up. It will travel along the back wall towards a large snow pile to the left and, before it reaches it, players will need to hit it with an Illumina Orb. If done correctly, four Snom will appear on top of the snow pile and players should quickly photograph them when they do. The photo needed for the request should be four star, so if players have anything lower, it likely means that they were too slow to take the picture or that all four Snom weren’t in the shot.
It Jumped Out at Me! Request Guide
 & How To Complete Them")
For the It Jumped Out at Me! request, players will need to have unlocked the first alternate route and be playing at research level 3. They should then head into the blizzard by passing through the first snow wall and then start performing scans on the trees on the left hand side. They will soon see three question marks, which means that the Crabominable needed for the request is now on its way.
Shortly after passing the second tree, the Crabominable will jump out towards players and they’ll need to get a shot of the moment that it does so to complete the request. The timing of the shot can be a little tricky, so Burst Mode can be very useful here. It is possible to get the four star photo that Phil is looking for without it though if players are yet to complete New Pokemon Snap’s main story to unlock it.
Fidgety Snorunt Request Guide
 & How To Complete Them")
Upon reaching research level 3, players will unlock the Fidgety Snorunt request from Professor Mirror. They’ll also notice that the Snorunt in the main cavern on the default route will start acting a little strangely, with many of them staring upwards at a stalactite that’s dangling above them. Players will need to hit this stalactite with a Fluffruit to get the photo that they need, although will have to act pretty quickly.
As soon as they have thrown the Fluffruit, they should tilt their camera downwards so that they can capture the moment that the stalactite pierces the ground. The Stalactite itself doesn’t actually need to be in the shot to complete the request, only Snorunt’s reaction to it falling, although getting it in there will lead to a four star photo rather than a three star shot.
Icy Armor Request Guide
 & How To Complete Them")
When following the default route, players will be able to find a Glalie on the left hand side of the big cave towards the end of the default route. Once it starts moving around, pelting it with Fluffruit will cause it to encase itself in an icy armor and players can snap a four star photo of it doing so to complete the Icy Armor request.
It’s also possible to complete the request the same way by using the Glalie in the frosty cave beyond the second snow wall. There’s another four star photo opportunity here too, if players use the Melody Player to make the Glalie move over near the Avalugg and then hit it with an Illumina Orb so that it bites its tail. Only the icy armor shot will count towards the request though.
Icy Playground Request Guide
 & How To Complete Them")
Once players have unlocked both alternate routes and reached research level 3, a rolling Spheal will start to show up on the frosty shore beyond the second snow wall. It will start out in the water before rolling counterclockwise around an iceberg with a hole in the middle and players will need to hit it with a Fluffruit as it passes so that it falls into this hole.
While it is in there, using the Melody Player will cause a Dewgong to emerge from the water beneath it and begin bouncing the Spheal up and down like a volleyball. Getting a photo of the Spheal while this is happening will be enough to complete the Icy Playground request and will also provide players with a four star photo for their Photodex. If they have time, players should also snap a four star photo of Dewgong while they are here.
Treasure-Hunting Troupe Request Guide
 & How To Complete Them")
While exploring the frosty shore beyond the second snow wall at research level 3, players will come across three Piplup on an iceberg. After a few moments the one on the left will dive into the water, but, before it does so, players should hit it with an Illumina Orb so that it is glowing when it enters the water.
If done correctly, the Piplup will emerge a few seconds later and pull out a shell that it found in the water’s depths. Players should get a shot of it holding the shell up like a trophy, which will not only count as a four star photo of Piplup, but also complete the Treasure-Hunting Troupe request for Todd.
You Can Do It, Vanilluxe! Request Guide
 & How To Complete Them")
Although Vanilluxe shows up in the frosty cavern past the second snow wall at lower research levels, players will need to be playing at research level 3 to complete the You Can Do It, Vanilluxe! request. That’s because an Avalugg that’s needed to scare it out of the cavern only shows up at that level, although players will still need to do a little bit of work to make the encounter happen.
As players enter the cavern, they’ll need to use the Melody Player while close to Glalie so that it moves over to the nearby Avalugg. Once it’s in position, hitting it with an Illumina Orb will cause it to bite Avalugg’s tail, providing four star photo opportunities for both Pokemon. Avalugg’s scream will cause Vanilluxe to flee, but players can find it again by throwing a Fluffruit into the hole in the wall to the left of the alternate exit. Once it appears, feeding it a Fluffruit and getting a shot of it eating is all that’s needed to complete Rita’s request. Players can also get a four star photo of Vanilluxe here by using the Melody Player, although this won’t count towards the request.
Dining Dewgong Request Guide
 & How To Complete Them")
Although it’s also possible to get a photo of Dewgong eating in the nighttime version of the course, players will need to complete the Dining Dewgong request wile playing Snowfields (Day). They’ll also need to be playing at research level 2 for whatever reason, so those who’ve already passed this point will need to lower their level accordingly by hitting the X button on the course select screen.
To complete the request, players should pass through both snow walls and make their way to the frosty shore. Here, they’ll need to throw some Fluffruit onto the iceberg with the two smaller icebergs on either side of it and then wait for Dewgong to climb out of the water. This can take a few moments, so it’s best to throw a few more Fluffruit just in case the first one disappears. Dewgong will soon start eating one of them and players can snap a photo of it doing so for Professor Mirror.
Gazing Down on the Snowfields Request Guide
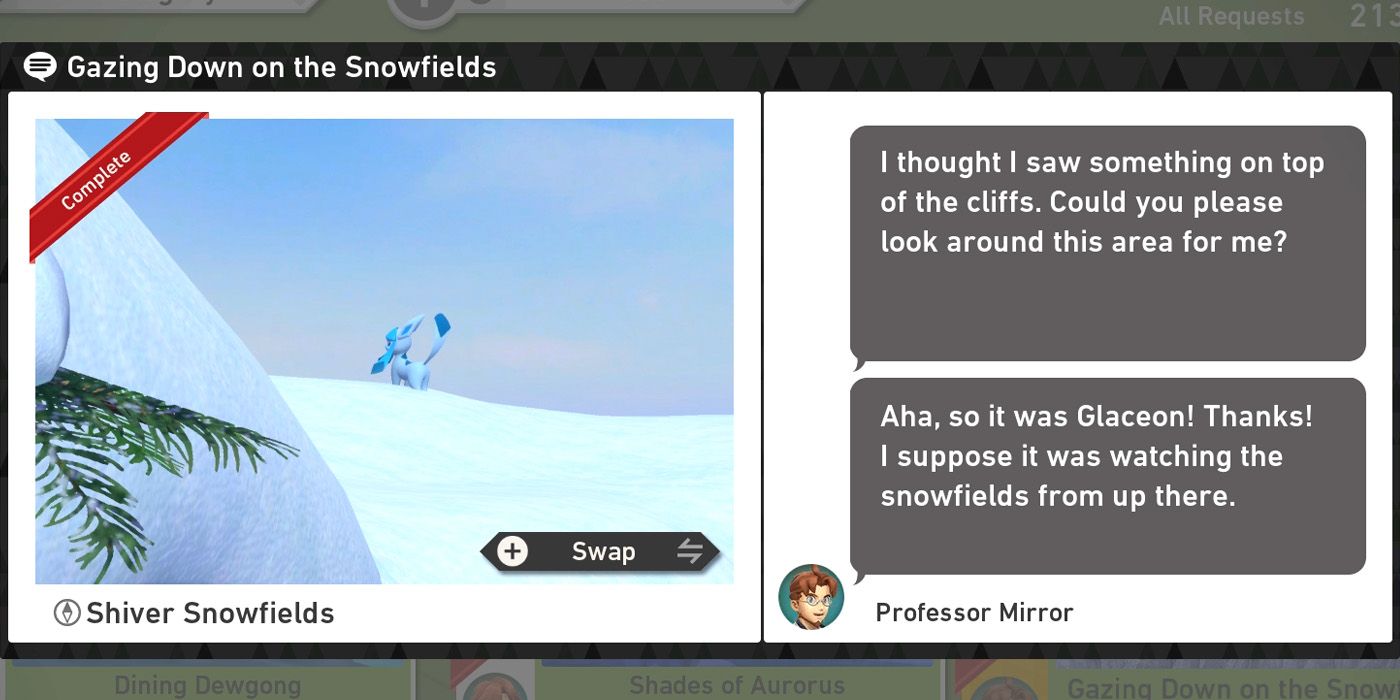
Players will need to wait until research level 3 before Glaceon starts showing up, at which point they’ll be able to find it as they’re leaving the area with the Mamoswine on the default route. Just before traveling down the steep hill that leads to the big cave, they should be able to spot Glaceon in the distance above the entrance to the cave and will need to snap a picture of it while it’s up there.
This is all that’s needed to complete the Gazing Down on the Snowfields request, although to get a better look at Glaceon, players will need to proceed to the final area of the course. Here, throwing a Fluffruit onto the small iceberg to the right will cause Glaceon to come down and hitting it with an Illumina Orb will provide a four star photo opportunity. Players should submit the photo of it gazing down before anything else though and will need to take another photo of it doing so every time they want to see it at the end of the course.
See more : PokemonWe