
Sea of Thieves: How To Complete All Deadly Trials Of Combat
Table of Contents
There are five Deadly Trials of Combat in Sea of Thieves. This is how to conquer them.
You Are Reading :Sea of Thieves How To Complete All Deadly Trials Of Combat

Late in January, Sea of Thieves launched its first ever season three years after the game came out. Following the format of many other service games, the season offers limited-time rewards and incentives to play the game. You can buy the Season Pass to unlock more rewards, or continue playing the game without it where you will still get a reasonable section of rewards if you gain enough reputation in the Season Experience.
One of the best ways to rank up your Seasonal experience is to complete the various trails that the game offers you over the course of the season, and the Deadly Trials of Combat are focused on engaging in some of the toughest fights the game can throw at you. There are five Deadly Trials of Combat in Sea of Thieves, each spilt into numerous deeds that require certain objectives to complete. This guide will walk you through each trial and guide to explain exactly what is needed to complete them all.
How To Complete The Deadly Hunter Trial In Sea Of Thieves

- Capture animals in cages
- Disable tentacles while fighting the Kraken
- Defeat different breeds of Megalodon
- Find and defeat The Kraken
The Deadly Hunter Trials ask you to seek out the greatest beasts and monsters the Sea of Thieves has to offer. The first deed, however, asks players to capture fifty animals in cages. While snakes, one of the three animals you can capture in cages are dangerous even in captivity, chickens and pigs offer no threat to your fearless pirate.
To capture an animal in a cage, first you’ll need to find a cage. Sometimes they can be found scattered around islands and washed up on shores, but its often easier to take a Trade Goods Commission Voyage from the Merchant Alliance. So long as some of the trade goods the Alliance want are animals, they will provide a number of cages to capture them.
Once you’ve got the cages, head to any island and begin looking for animals. As mentioned above there are chickens, pigs, and snakes available to capture. They spawn randomly so you might not find any on one particular island, so be ready to ship out elsewhere if needed. Chickens and pigs will run from you as your approach with the cage, but snakes will stand their ground. Watch out for their poison spit and if possible have a crewmate play some music to hypnotise the snake as you approach and carry it in the cage to avoid the purple ichor.
This deed requires you to capture fifty animals which is quite a lot. If you regularly complete the Trades Good Commission Voyages this deed will complete organically, but you might need to spend some time grinding to complete this deed. And the way you grind this particular deed is really going to annoy PETA.
Once an animal is in cage, there is only one way to remove it, and since cages are quite difficult to come by its often worth emptying them to use repeatedly. There are loads of ways to kill the animal instead the cage but a pistol shot is probably the quickest. With a few cages and a few rounds of ammo you can quickly rack up loads of captured animals, even if they are never turned in.
Once you capture your fiftieth, the deed will complete.
The second deed wants you to disable twenty Kraken Tentacles. This giant squid world event roams beneath the waves of the Sea and will lash out violently with its tentacles at any ship that it comes across.
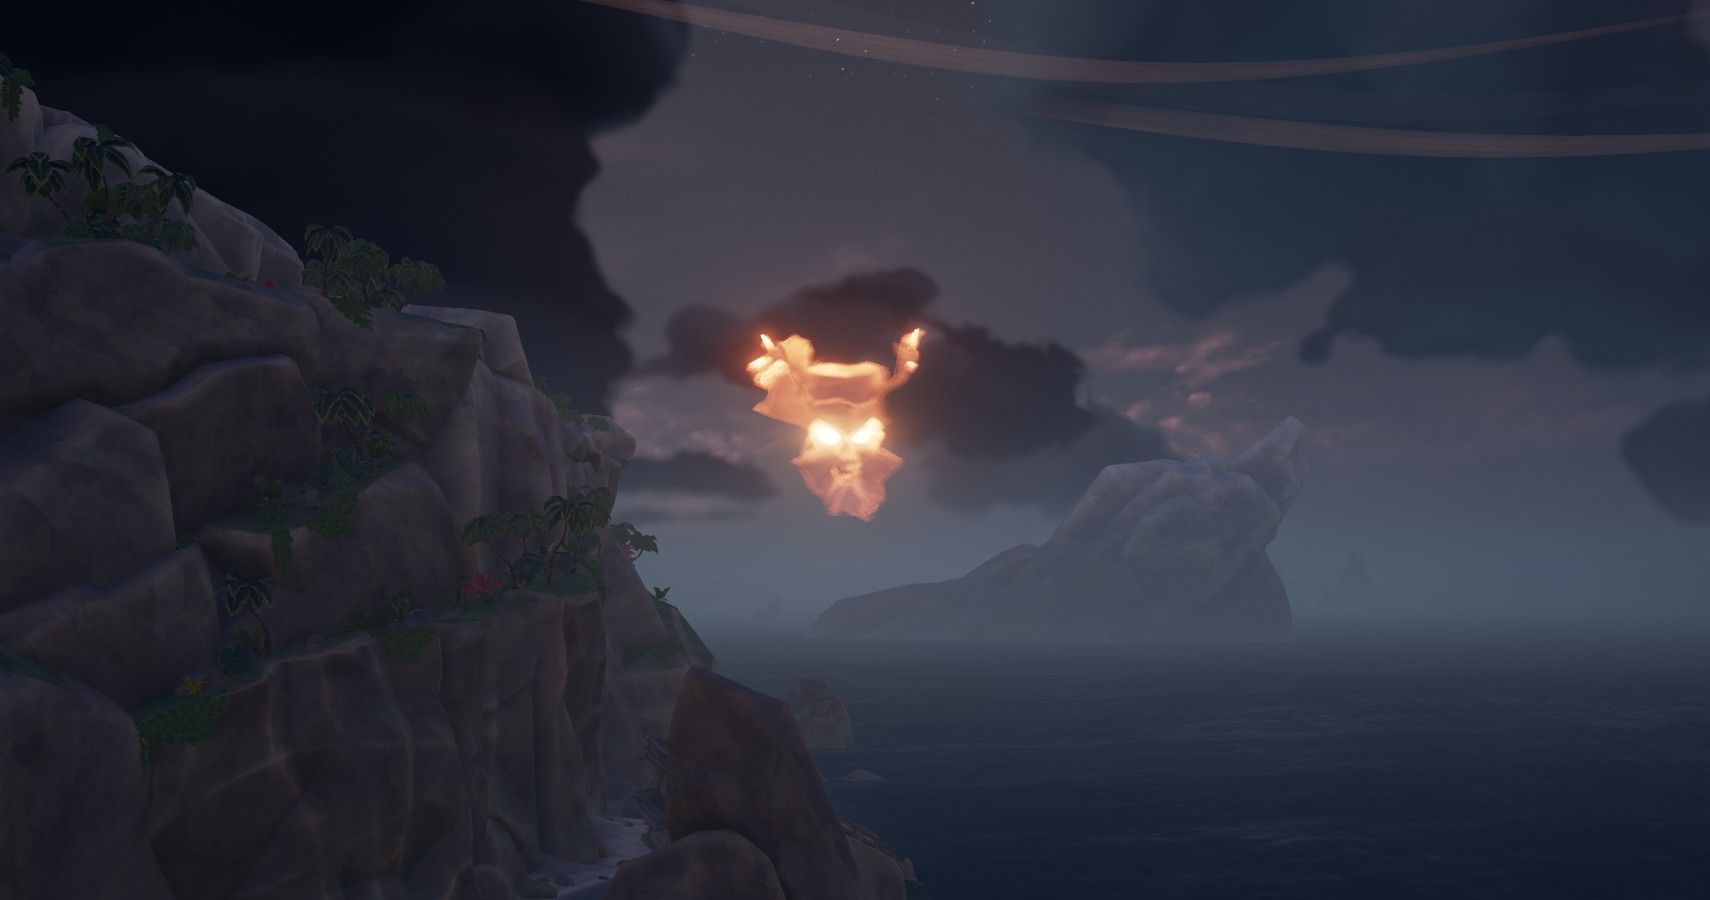
But before you can disable the Kraken’s tentacles, you’ll have to find it first. The Kraken will only appear when no other world event is active, which means that if you can see the scowling face of Flameheart, the ominous clouds of a skull fort or armada, or the ashen tornado of an Ashen Lord, the Kraken will not be available. These world events will cycle out every couple of hours or when a crew manages to overcome them. If you can’t see any other world event signifies (and you’ve checked behind any mountains and storms that might be obscuring them) that means the Kraken is active, and will be attacking a ship. If its not you, its someone else and you’ll have to try and chase the horizon looking for the attack to get involved.
Secondly, the Kraken roams the open waters, so try and stay away from islands while you’re out hunting the beast. If you’re at an island when the other world events end, you’ll miss this chance to fight a Kraken.
Once you’ve encountered the Kraken, you’ll see that the water around your ship turn black as several tentacles spawn at various distances. The black water will slow your ship so be careful about sailing out of the attack if you are indeed trying to fight the beast. These tentacles can attack the player and the ship so be ready for a varied battle. Your ship will also be vulnerable to unscrupulous pirates so make keep an eye out for other ships approaching.
Disabling the tentacles is simple enough: use your cannons wherever possible to hit the tentacles or your Eye of Reach snipe rifle when you can’t get an angle, although this is far less effective. To make the situation more difficult, the Kraken will fight back and can do so in a number of ways. Some tentacles will suck a player off the ship dealing damage and dumping them in the sea reducing the effectiveness of the crew. Tentacles can also wrap around the ship and begin crushing it. This can be a huge problem as the tentacle can block access to certain parts of the ship, as well as dealing damage. If this happens use your cutlasses to cut the tentacle off as soon as possible, but be careful as Kraken blood will poison you so be ready to stock up on supplies.
The other way the Kraken can attack is to simply lash the boat. This will do massive damage to the side hit and potentially spin out the ship, but it is almost impossible to avoid.
Each Tentacle takes several direct hits with a cannonball but once enough damage is done it will scream and writhe back into the water. Disabling twenty of them will have to be done over several Kraken encounters defeating the Kraken always takes less than ten. Once you’ve blasted twenty back to the depths, you’ll have completed the deed.
The third deed wants you to hunt three different types of Megalodon throughout the Sea of Thieves. There are five different Megalodon that can be found in the open waters throughout the game. The Hungering One is blue, The Crested Queen is purple, The Shadowmaw is dark grey, and the Ancient Terror is yellowish. The final Megalodon, the Shrouded Ghost is a pale grey but the odds of it spawning are extremely small.
Unlike the Kraken, these creatures are endlessly roaming the seas and there isn’t a particular moment or method to summon them. Instead, you’ll undoubtedly encounter them as you play the game organically. Try and mark its colouring straight away so you can identify if this is a target you need to defeat for the deed. Like the Kraken, these beasts cannot be found near islands and will retreat if the ship they are hunting gets too close to the shore. You’ll find them at random on the open shore, and you can tell the difference between them by their colouring.
Once you have a Megalodon circling your ship the battle can commence, you’ll want to trim your sails by half and attempt to begin turning the ship so you’re in a reasonably tight circle. You can also use the harpoon guns at the front of your ship to help position yourself if needed. With that setup, all you have to do is blast the Megalodon with every cannon at your disposal until you defeat the creature.
Obviously, it will fight back and you’ll occasionally see it rush your ship with its mouth wide open. You do not want to be on the side of the ship it is attacking, as it will most likely kill you or throw you into the sea. Getting below deck is the same way to survive the assault, and the smartest place to be since the giant shark will also deal huge damage to the hull you will have to repair. After you’ve defeated three of the five Megalodon’s the deed will be completed.
The final deed wants you to defeat the legendary Kraken. To do this you have to find the Kraken and disable enough of its tentacles. The number of tentacles needed to defeat the Kraken depending on the ship attacked. Sloops only need two or three tentacles disabled to defeat the Kraken, while Brigantine’s need five or six. Galleons, as the biggest ship in the game, require seven or eight disabled tentacles to stop the attack.
The Kraken will also give up the attack after several minutes so you have to work constantly to defeat it. For more information on the tactics to find and attack these tentacles, check out the first deed of this guide.
How To Complete The Deadly Mercenary Trial In Sea Of Thieves

- Hand in all type of Bounty Skulls to the Order of Souls
- Defeat every Skeleton Lord on land at least once
- Equip the Order of Souls Costume and ship livery as an Order of Souls Emissary
- Light up a Skeleton Ship using an Ashen Winds Skull
The Deadly Mercenary Trial wants you to become a master of the Order of Souls and learn to use and harvest the skulls they require to your own ends. The first deed wants you to hand in every type of bounty skull to the order of souls.
There are nine skulls you will have to find and hand in to complete this deed, although this can be done over several sessions. Bounty Skulls can be found by defeating Skeleton Captains and occasionally as rewards and treasure from forts, ships, and buried chests.
The first four Bounty Skulls are common skulls found through the Sea of Thieves and can most easily be acquired by completing Bounty Skull Voyages for the Order of Souls. The Foul Bounty Skull is the most common and least valuable, followed by the Disgraced Bounty Skull, the Hateful Bounty Skull, and finally the Villainous Bounty Skull.
The next four Bounty Skulls are rarer and more region specific. They are variants of the regular skulls but rarer in all regions outside the Devil’s Roar. You can tell the difference between these and the regular ones thanks to the red lines and the Ashen tag in the name. Finding these is easiest by taking Ashen Bounty Skull Voyages, which you can determine by seeing finding the voyages with the red outline at the Order of Souls representative, although they are not always available.
The final skull is technically not named a Bounty Skull. The Skull of the Damned at the ghostly skulls awarded for defeating Ghost Ships either as part of the Ghost Ship Voyage or by encounter the Flameheart World Event. For more information on how to find these, check out the Infamous Ghost Hunter Trial Guide.
Each of these skulls will have to be delivered to any of the Order of Souls representatives at any of the outposts. Once all the skulls have been turned in, the deed will be completed.
The second deed wants you to defeat every Skeleton Lord on land. Skeleton Lords are perhaps the most troubling and difficult single enemies in the game, with a huge variety of attacks that target both individuals and areas, as well as loads of health. Defeating them requires a full assault and should be done with a full crew whenever possible. You’ll also needed to be loaded up with supplies and ammo if you hope to defeat them, and accept that you’ll probably die a couple of times.
Some Skeleton Lords can even damage ships at sea so make sure your ship is at a distance when you encounter one of these terrifying foes. You can always use the cannons to launch yourself into the fight if you happen to die. All Skeleton Lords can summon other skeletons as well so you won’t simply be able to overwhelm them with numbers.
There are ten Skeleton Lords in total, but only three appear consistently in the same conditions. These three can be found by completing the Shores of Gold Tall Tale Arch. The first, Captain Briggsy can be found at the end of the Cursed Rogue Tall Tale. The second, Graymarrow, can be found at the end of the Revenge of the Morningstar Tall Tale. The final Shores of Gold Lord can be found on the Shores of Gold themselves, on the final Tall Tale, also named the Shores of Gold. He is the Gold Hoarder and the fight will be a large cave so at least you don’t have to worry about the ship getting destroyed.
For more information on the Tall Tales and how to complete them, check back as we’re working on creating guides for each.
The next three Skeleton Lords spawn during the final wave of an Active Skeleton Fort. Look out for the eerie Skull cloud that signifies an active fort and fight through the several earlier waves to spawn one of this Skeleton Lords.
Which one is spawned is entirely random so you will have to keep completing forts until you have seen all three. They are The Duchess, who has a beehive haircut and wears a dress, The Mutinous Helmsmen, a Skeleton Lord with a steering wheel lashed to his back, The Two-Faced Scoundrel, a two-headed pirate.
The last four Skeleton Lords needed to complete this deed are the Ashen Lords. These also spawn randomly but are even tougher than the others and are an event in and of themselves. You can see if this event is active by looking for the ashen tornado on the horizon, with one of them spawning on the island below it.
On top of the regular abilities, these Ashen Lords can also boil the waters around the island and throw fiery cannonballs at ships in range. For more information on Ashen Lords, check out the Infamous Firestarter Guide. But these will also spawn randomly so you’ll have to attempt them all until you have met and defeated each Ashen Lord. They are Captain Grimm, a large figure with a hook hand, Old Horatio, a smaller figure with a pegleg, Red Ruth with one ornate armoured hand, and Warden Chi with antler like horns of fire.
Once you’ve managed to find and defeat all these Lords, the deed will complete.
The final deed wants you to use an Ashen Winds Skull to set a Skeleton Ship on fire. Ashen Winds Skulls are rewarded for defeating Ashen Lords, so consider doing this while doing the previous deed. For more information on Ashen Winds Skulls, check out the Infamous Firestarter Guide that details their effect and power.
Basically, the skull allows the wielder to use it as a flamethrower for just under a minute. To complete this need you will have to equip the skull and then use it to set a skeleton ship on fire. This means that you will either have to get right next to a skeleton ship, or board while carrying the skull.
The former is normally the easiest move since you cannot take the skull with you into a cannon, and there is less chance of losing it to the ocean. After finding a skeleton ship roaming the waters or being attacked by one at random, the best method to burn it is to first collide with it. Steer the ship so you can crash headlong into the enemy vessel and use the skull at the very front of the ship and ignite it as you strike. Once complete you can quickly spirit the skull away to safety to be handed in or used later, and the deed will have been completed.
How To Complete The Deadly Reaper Trial In Sea Of Thieves

- Hand in Athena’s Fortune items to the Reaper’s Bones
- Hand in Gold Hoarder items to the Reaper’s Bones
- Hand in Merchant Alliance items to the Reaper’s Bones
- Hand in Order of Souls items to the Reaper’s Bones
- Hand in a broken Emissary Flag from each Company as a Reaper’s Bones Emissary
- Hand in a Chest of Ancient Tributes and a Vault Key to the Reaper’s Bones
- Equip the Reaper’s Bones Costume and full ship livery as a Reaper’s Bones Emissary
The Deadly Reaper trials want you to fully commit to the strange and dangerous Reaper’s Bones. The first four deeds want you to turn over five items from the other major Trading Companies to the Reaper’s Bones. Unlike every other Trading Companies, the Reaper’s Bones aren’t picky about what you give them, in fact they seem to enjoy depriving the other of their gains.
So to complete these deeds you simply have to gather the necessary treasure for each of the other Trading Companies (Athena’s Fortune, Gold Hoarders, Merchant Alliance, and the Order of Souls) and deliver instead to the Servant of the Flame on Reaper’s Hideout at I/J-12. To do this, take on and complete a voyage from which ever Trading Company you need to betray, which will normally involve collecting around five pieces of treasure or more, before setting sail for the Reaper’s Hideout. You might also get lucky and find treasure chests and skulls without taking on a voyage which can count towards the Gold Hoarders and Order of Souls deeds if you hand them over to the Servant of Flame.
The Merchant Alliance can be a little trickier as they don’t want conventional things and you cannot deliver delivery items to the wrong person. You can deliver animals, and full resource crates to the Servant though so try to focus on them. Try and take a Trade Goods Commission from the Merchant Alliance where they will hand over as many cages as you would need, then catch some animals and give them over to the Reaper’s Bones instead, and try not to think about what they’re going to do with them. Once you’ve handed in five of each of the Trading Companies items over, you’ll have complete the four deeds.
The next deed wants you to hand over a broken Emissary Flag from each Company while flying the Reaper’s Bones Emissary flag yourself. First, make sure you have voted on the Reaper’s Bones Emissary Flag from their Emissary table before you attempt to do this deed. Any progress made without that flag waving won’t count.
To acquire a broken Emissary Flag you have to sink a player ship that had an Emissary flag hoisted, so you’ll have to get into at least five naval battles to achieve this deed, though you don’t need to do it all in the same session.
The five broken flags you need to hand in at The Gold Hoarders, The Order of Souls, The Merchant Alliance, Athena’s Fortune, and the Reaper’s Bones themselves. If you’ve already completed the Infamous Trials of Combat challenge you will have already worked some way towards this deed, as long as you can remember what Emissary flags you’ve turned in.
When hunting over the waves make sure you’ll only attacking vessels that have an Emissary Flag waving in the wind. You can see them hanging off the back of the ship and small twin flag on the Crows Nest. They will also be marked with the Trading Company they represent so as you progress you can rule which ships you need not attack.
If you’re struggling to find the ships, start patrolling the waters around outposts. Most crews will have to return to these eventually to hand in all their gains and it’s the best place to find players. Look out for any approaching sails and be ready for a fight if they’ve seen you too. More importantly, look out for any ships that approach the outpost then turn away when they see you. If they have Emissary Flags on they’re an even more valuable target because they either don’t believe that they can win, or don’t want to risk all the treasure in their hold.
It is recommended that you attempt to do this with a full crew so you can use the full arsenal of the Galleon and resist the most damage, but it is possible to win battles with the Sloop and Brigantine as well.
The next deed demands that you hand a Chest of Ancient Tributes and a Vault Key to the Reaper’s Bones. Ancient Tribute chests can only be found at the end of a Wayfinder Voyage purchased from the Gold Hoarders. Wayfinder Voyages task crews with piecing together a map that leads to a Vault Key. The vault key itself can be handed over to Gold Hoarders, or it can be used to find and access the Treasure Vault.
Once opened, the crew will have a limited time to loot the vault for all its worth before it closes again. But to acquire the Chest of Ancient Tribute, the players will have to find three medallions scattered around the vault which can be used to solve the four pillar puzzle inside. The medallions will show the first three pillar positions, while the fourth pillar will be a combination of those. Once unlocked, you’ll be able to get the Chest of Ancient Tributes.
So to complete this deed, you’ll essentially have to complete two Wayfinder Voyages, one by turning in the key to the Reaper’s Bones, and one by turning in the Chest of Ancient Tribute. For more information on the Wayfinder voyages, check out the Master of Exploration Guide.
The final deed in the Deadly Reaper Trial is to wear the Reaper’s Bones costume and have the full ship livery equipped while a Reaper’s Bones Emissary. This is pretty similar to the Infamous Reaper trial that wants you to wear the full costume while being an Reaper’s Bones Emissary but to complete it you will have to have level 75 reputation with the Reaper’s Bones.
You’ll have to buy the Emissary Flag from the Servant of the Flame before you can purchase the Reaper’s Bones Costume. After that you’ll need to buy each piece of the Reaper’s Bones ship cosmetics that are unlocked as you raise through the ranks of the Trading Company. You’ll need to be rank 75 to unlock all the nessecessary parts of the comestics to complete the livery which means you’ll need to put in a lot of hours and turn over a lot of broken Emissary flags and other treasures to rank up. In total you’ll also be putting down about half a million gold to unlock the full set and complete this deed.
Once you’ve unlock and equipped the full set for you ship make sure you’re wearing the costume and have voted on the Reaper’s Bones Emissary flag to complete this deed.
How To Complete The Deadly Detonator Trial In Sea Of Thieves

- Hand in a Stronghold Gunpowder Barrel
- Destroy a group of 3 Gold Skeletons using one Gunpowder Skeleton
- Destroy a group of 3 Plant Skeletons using one Gunpowder Skeleton
- Destroy a group of 3 Shadow Skeletons using one Gunpowder Skeleton
- Destroy a group of 5 skeletons using one Gunpowder Skeleton, at a Fort, with another crew presents
The Deadly Detonator trial wants you to handle the most explosive item on the Sea of Thieves, and blow up a lot of skeletons as well. The first deed wants you to hand in a Stronghold Gunpowder Barrel. These rare barrels are much more explosive and deadly than their regular counterparts, and also worth much more if you can turn them.
The easiest way to find one is to complete an active Skeleton Fort as there will always be one in the vault, but they can be found very rarely out in the wild too. Once you have the Stronghold Gunpowder Barrel securely onboard, sail it to the nearest Outpost and hand it into the Merchant Alliance to complete this deed. We recommend keeping the Stronghold Gunpowder Barrel on the crows nest unless in a storm as it will do tremendous damage if detonated below deck.
For more information on the handling of the explosives, check out the Proficient Trial of Adventure guide.
The next three deeds want you to destroy a group of three skeletons by exploding one gunpowder skeleton. Each group the deeds want you to destroy are a different variant of the standard skeleton enemy: Gold, Plant, and Shadow. So to complete this deed you will have to find a group of each variant with a Gunpowder Skeleton with them, then destroy at least three with the ensuing blast.
To have the best look at finding the right conditions to complete this trial, you should take on Order of Souls Bounty Voyages as they will regularly spawn variant enemies. If you have a larger crew, you can also assault active forts where this trial can also be more easily achieved.
Once all the necessary enemies are on the field, you’ll have to make sure they are close enough together to be destroyed in the blast. You’ll also probably want a pistol equipped for good midrange accuracy. Move in a large circle around the enemies to have them group up, killing any ranged stragglers that are causing you problems. Once they’re in a tight group, take the shot to detonate the barrel and you should complete the task.
Gold and Plant skeletons are relatively easy to do once you’ve found them, but remember with Shadow Skeletons that they will need to be vulnerable, so you should only attempt this outdoors during the day with this particular variant.
The final deed for the Deadly Detonator is extremely specific: it wants you to destroy a group of five skeletons using one Gunpowder Skeleton, at an active fort, with another crew present. While you might happen to stumble across another crew at an active fort, or one might stumble into you, it is normally recommended that you find a friendly crew before attempting this deed. Look for other player ships and make sure you have your alliance flag raised to show you mean them no harm. Use in-game chat to try and communicate and ask if they would like to assault a fort with you. Assuming they don’t outright attack you, most pirates want the fortunes found at the end of the fort. It is a good idea to tell them at this point that you are aiming to complete this deed, so you can try and organise yourself on the fort while not distracted by all the deadly enemies.
Once you’ve got the crew sorted, you’ll need to find an active fort. These are noticeable thanks to the ominous skull cloud that appears above the active fort for the duration it is active. Remember that an active fort can be seen by every player in the game so don’t expect to do one interrupted. Once you’ve made it to the fort with the other crew in tow, you’ll have to wait for your opportunity. There are many fort waves so if not gunpowder skeletons spawn in one wave its not the end of the world. Once you can see one, you’ll have to wrangle a group together much like the previous deeds before using your pistol to explode them all.
Have the other crew deal with any ranged enemies and attempt to lure any extra Gunpowder Skeletons away so you don’t accidentally blow yourself up. Its normally easiest to do this with the slow-moving Golden Skeletons, but it is possible with any variant. Remember though, that Shadow Skeletons are immortal unless regularly exposed to light so try and face them during the day or have the other crew use lanterns to make them all vulnerable to the explosion.
How To Complete The Alliance Adept Trial In Sea Of Thieves
- Defeat Flameheart’s Ghost Ships while in an Alliance
- Hand in broken Grade 5 Reaper Emissary Flag as a Reaper’s Bones Emissary
- Finish the Fort of the Damned while in an Alliance
The Alliance Adept Trials require you to check out other ships, although not always for the best of intentions. The first deed wants you to defeat five of Flameheart’s Ghost Ships while in an alliance. Like with the last trial, it is normally best to try and form the alliance before meeting Flameheart’s armada out at sea.
Once you’ve met a friendly crew and joined an alliance with the Alliance flag in the crow’s nest, you can seek out Flameheart. You know if he’s active because you’ll see his big orange face on the horizon. As you approach you’ll see his Ghost Ships circling under his ugly mug. Your allied ship does actually have to be here to complete the deed, but you will have to be the one to destroy the Ghost Ships for it to count towards your deed.
Each regular Ghost Ship takes around three cannon strikes to be defeated, but they will explode once destroyed and knock all nearby ships about so try and avoid getting too close. They also have special munitions that can ignite or shove your ship as you’re in combat so look out. Once you’ve blasted five ships back to the ghost sea without your alliance being cancelled, you’ll complete this deed.
Your second deed wants you to turn in a Grade 5 Reaper Emissary Flag as a Reaper’s Bones Emissary. To attempt this deed, you will need to have bought and voted for the Reaper’s Bones Emissary Flag. It can be bought from the Servant of Flames on Reaper’s Hideout and voted for the Reaper’s Emissary Table found on the same island or hidden away on every outpost.
Once you’ve done that you will need to hunt down and defeat another player ship that is also flying the Reaper’s Emissary Flag and is Grade 5. If you cannot find anyone of that rank, you can also try and help another ship reach that level, or quit the game and reload into a different server to see if you have had any better luck.
Improving your Reaper’s Bones Emissary flag primarily means handing in broken Emissary flags to the Servant of the flame, and Grade 5 is the highest grade possible. You’ll also lose your grade if your ship is destroyed, so finding a Grade 5 Reaper’s Emissary ship means they are very good at naval combat.
And to get the broken flag from them, you’ll need to defeat them, and it might be easiest to do this by playing dirty. You can try and form an alliance with another crew and attack together, or use Gunpower Barrels to attempt to sink them without engaging in direct combat. If you can get onboard their ship and defeat the crew you can make it very difficult for them to repair their ship and might be able to destroy it that way.
No matter what you have to make sure their ship sinks, then collect the Broken Emissary Flag from the debris that floats to the surface. Once you have that onboard, make sure you are flying the Reaper’s Emissary Flag yourself before handing it into the Servant of the Flame. Once you have done so, you will have completed this deed, and probably made a powerful enemy.
The final deed in the Alliance Adept Trial is to complete the Fort of the Damned while in an Alliance. This is one of the longest and most challenging tasks available in Sea of Thieves so make sure you have plenty of time and a full crew before competing to do it. First, like with the others, you should seek an alliance before attempting the Fort of the Damned. While you don’t need them to be with you on the fort, it is easier if they are, so ask if they want to help.
Once you’ve got your alliance and hopefully some helping hands, you can look to start the Fort of the Damned. Unlike the other forts and world events in Sea of Thieves, the Fort of the Damned is activated by players, although it is no easy feat to do.
To activate the Fort of the Damned, you will first have to collect the six Flames of Fate from the Ferry of the Damned as well as a Ritual Skull. The voyage to find the skull can be purchased from Liranna but you can only purchase one of these voyages a month so don’t waste it. You can also find a Ritual Skull by defeating an Ashen Lord or Skeleton Fleet. There is also a chance you can find them on regular Skeleton Ships.
While hunting down a Skull you can also start collecting the Flames of Fate. That means being killed by skeletons, sharks, other players, fire, lightning, and poison. Each time you’ll have to store that coloured light on your ship as well so its not lost, which means you can let your ship sink while you’re doing this.
Once you’ve got all six flames and the Ritual Skull you can head to the fort at L-14 on the map. From here you will have to light each of the statues with the correct light, with each statue giving a hint as to what light they want to receive in their design. Once the statues are lit you can place the Skull to activate the Fort.
It is very important to remember that the activated Fort of the Damned will be seen by all the players on the server and it is a highly sought prize so you may have unwelcome company.
Once the Fort of the Damned is activated, you will have to fight a series of waves similar to a regular Skeleton Fort. Unlike a regular Skeleton Fort, the waves that spawn will be Shadow of Fate Skeletons rather than your typical variants. These unique enemies will appear like Shadow Skeletons but in a variety of colours, each one matching one of the Flames of Fate you gathered to activate the fort. These Shadow of Fate Skeletons will not be made vulnerable under sunlight or any other light but the Flame of Fate that matches their colour. This means you’ll have to take your lantern light from the correct statue and raise it high to start defeating these skeletons.
The latter half of the battle will have Shadows of Fate Skeletons of two different colours spawning, meaning you’ll have to work with another player to have both coloured lanterns available to attack them. It is a challenging fight throughout so make sure you’ve got plenty of supplies and are reviving teammates whenever possible.
During the final wave, the Ghost of Graymarrow will spawn, a Skeleton Lord with loads of health and abilities. He will also be able to spawn more Shadow of Fate Skeletons, so it is normally best to have half the players constantly fighting him, and the other half immediately dealing with a wave when they spawn.
This is also a good time for unfriendly pirates to swoop in and attempt to wrestle control over the Fort away from you so be on the lookout for ships entering the fog.
It will take a while to defeat Graymarrow but once he is dead, the Fort of the Damned Raid will be complete and you should have finished the deed. Now quickly grab all the valuables and get away.
Link Source : https://www.thegamer.com/sea-thieves-deadly-trials-combat/