
Sea Of Thieves: How To Complete The Shrine Of Ancient Tears
Table of Contents
With this guide, you’ll know how to solve this shrine’s puzzles to get the most valuable loot and find the five journals hidden within.
You Are Reading :Sea Of Thieves How To Complete The Shrine Of Ancient Tears

Quick Links
The Siren Shrines added to Sea Of Thieves’ Season 4 are chock full of coral treasure that can fetch a pretty penny on the surface. They also have very different layouts that can involve plenty of swimming, fighting, and puzzle-solving. The Shrine Of Ancient Tears is one of the most puzzle-heavy shrines as it requires a bit of thinking and lever-pulling to find the valuable loot hidden behind its locked doors, which includes the lucrative Chest Of Ancient Tributes.
With this guide, we’ll show you how to solve this shrine’s confusing door puzzles as well as how to find all the hidden journals lurking within.
How To Solve The Shrine’s Puzzles And Find The Chest Of Ancient Tributes
- After you’ve swum down to the shrine, look for a Siren Window — which are those watery force fields you may have seen in Season 3’s A Pirate’s Life Tall Tales — and shoot the blinking piece of coral above it to get inside.
- Head down into the main chamber where you should see a waterfall, stone steps, and a flooded well at the bottom.
- Around the steps, you’ll see unlit braziers like this:

- There are four of them along the staircase. Take out your lantern and light each one of them.
- You should also see buttons on the floor that have three triangles and a line underneath scribbled on them. There are four of them as well and they’re part of a timed puzzle.
- Once you step on one you’ll hear a clicking sound which is your cue to get moving.
- Step on each of these buttons before the timer runs out and you’ll open up a door that has a similar symbol next to it at the top of the steps.
- Head inside that new room and you’ll see four more unlit braziers. Light them on fire and a door directly across from you on the lower level will open.
- Head through that new entrance you just opened. Take note of the area in front of you that has a Sunken Merfolk Statue and glowing mushrooms in the middle as that will be important later. Each of the areas ahead will be marked by a painting of an animal. This first area has a butterfly painted on the walls.
- These areas all revolve around puzzles that involve lighting braziers and pulling levers. The levers will be timed like the buttons in the main chamber. Speaking of buttons, there will be some of them on the floor, and walking over them will open secret compartments on the wall where extra treasure is typically stored.
- In this butterfly zone, you need to light three braziers and then quickly turn on three levers. This will open a door at the end of the hallway with a butterfly symbol on the floor in front of it. Head in there and you’ll now be in the turtle section of the shrine (you may have to fight a coral skeleton or two along the way.)
- Now walk around and find more braziers to light. In the turtle section, there will be six.
- Once they’re all lit, find and pull the three levers here before the timer runs out.
- When you do that, there are two doors with turtle symbols in front of them that will open.
- One will lead you to the parrot section, while the other will open up a small room with another Sunken Merfolk Statue and two more braziers to light.
- Light those braziers then proceed to the parrot area.
- Once again, search for four unlit braziers, light them, and then pull three levers before the timer runs out.
- In this area, you may notice one of the levers is missing. That’s because it’s in one of those secret compartments that opens when you press a button on the floor.
- Head to the entrance of this area and you’ll see a button on the ground next to a lever. Stand on that and the compartment with the hidden lever will open.
- Pull all the levers and you’ll open the entranceway to the crab section.
- Light four more braziers and then find the buttons on the ground.
- Two of the levers in the crab area are hidden in secret compartments. The compartments with the levers inside have the crab painting above them. One of the buttons is near the entrance to this area, while the other is submerged in water near the end.
- Pull the levers and that will open the door at the end of this section.
- Go through that door and you’ll see that you’re back at the beginning.
- Go to the area with the glowing mushrooms and the wall behind them has now opened.
- Head into this new room and you’ll see some treasure along with a big button in the middle. Step on that to reveal three secret compartments filled with valuable treasure. One of these compartments will contain the Chest Of Ancient Tributes, which can fetch you a minimum of 3,400 gold and potentially much more depending on your emissary level.
- Store all the treasure you’ve found with the nearby Sunken Merfolk Statue and congratulate yourself on solving The Shrine Of Ancient Tears.
Shrine Of Ancient Tears Journal Locations
Each shrine has five hidden journals that you’ll need to find so you can earn an achievement and a commendation, as well as complete the Aquatic Archaeologist seasonal trial of your Plunder Pass. You also need to find all of the journals within the shrines so you can buy the Legend Of The Sunken Kingdom voyage from Larinna. Here’s where they are in the Shrine Of Ancient Tears.
Journal 1: Shrine Of Ancient Tears

Near the flooded well at the bottom of the main chamber, you should see an altar with a yellow upside-down triangle symbol and four unlit braziers. The first journal can be found on the right side of this.
Journal 2: Strange Tales
On the stone steps in the main chamber, head up this ladder.

Keep going up, jump across some coral platforms, and you’ll find a room with a lever that has a blue water symbol in front of it. Pull that and you’ll drain the well. Go down into the well and you’ll find a room with another altar that has four unlit braziers.

The journal is lying on that. Now light the braziers to exit the well and find a hidden area with more treasure.
Journal 3: Return Of The Silver Blade

In the turtle section, this journal can be found on the ground near one of the braziers you have to light. It’s to the right of the room that opens up that has two additional unlit braziers and a Sunken Merfolk Statue inside.
Journal 4: Fate Of The Silver Blade

In the area with the glowing mushrooms in the middle, this journal can be found on the ground to the right underneath the torch with the crab symbol above it.
Journal 5: The Chest Of Everlasting Sorrow
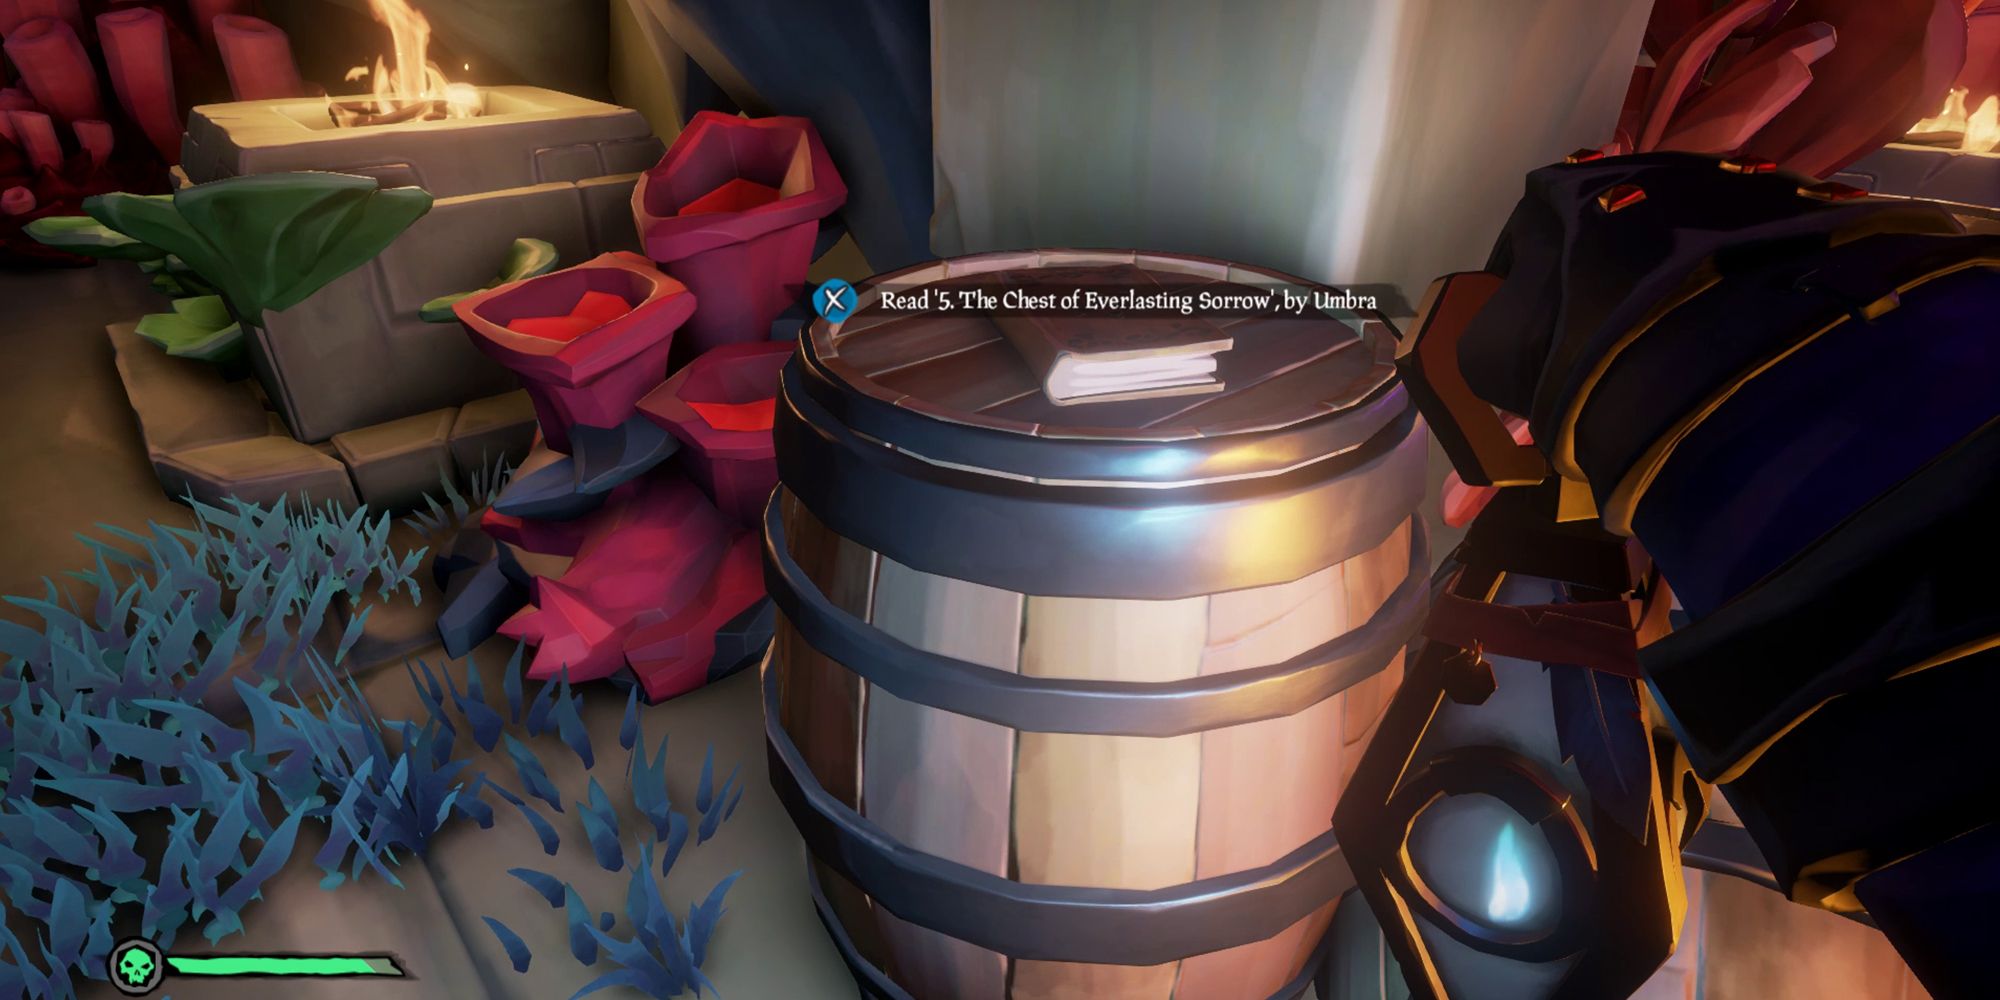
This one can be found early. When you light the braziers and activate the buttons on the floor in the main chamber, head inside the room that opens. You’ll find this journal sitting on top of one of the barrels.
Link Source : https://www.thegamer.com/sea-of-thieves-the-shrine-of-ancient-tears-completion-walkthrough-guide/