
Sea Of Thieves: How To Complete The Shrine Of Hungering
Table of Contents
This guide will help you navigate the shark-infested waters of the Shrine Of Hungering and find the journals hidden inside.
You Are Reading :Sea Of Thieves How To Complete The Shrine Of Hungering

Quick Links
The Siren Shrines of Sea Of Thieves Season Four offer up a variety of different challenges. Some focus on combat, some focus on platforming, while some of them involve puzzles for you to solve. The Shrine Of Hungering offers up a little bit of all of that as you navigate its flooded chambers to find the treasure stored within.
If you’ve found the layout of this shrine to be a little confusing, this guide will help you make your through it and find the five hidden journals stashed inside.
How To Get Through The Shrine Of Hungering
Swim down to the shrine and look for an entrance that looks like the open mouth of a cave. As you swim inside, you’ll find an ammo chest and an armoury not too far in. That’s because you’re about to find out why they called this the Shrine Of Hungering: it’s filled to the brim with hungry sharks. A couple of sharks should greet you as you enter the shrine, so shoot them with your firearm of choice and continue. There will be a coral tube spewing bubbles just ahead to supply you with extra oxygen if you’ve run out of air.
Keep swimming forward and kill sharks as they appear. You should now be in an area where there are three statues holding a gem, a chain, and a piece of coral, along with a statue that looks like it’s blowing into a conch shell. If you’ve gone through any of the A Pirate’s Life Tall Tales from Season Three then this puzzle should be pretty familiar. Look for this picture on the wall.

This tells you the way each statue needs to be set. You need to shoot or attack the statues to align their positions with what the picture looks like.
So that means the statue holding the chain needs its arm to be down, the statue with the gem needs its arm in the middle, and the statue with the coral needs to have its arm raised high in the air.
Set each statue like this and hit the statue with the conch shell. It’ll play a tune and water will fill up the chamber. This will also cause more sharks to appear, so either kill them or move on.
You’ll find a geyser that will shoot you upwards onto a higher platform with more statues for you to set. Look for another picture on the wall with different statue positions.
For this one, the statue with the gem should be low, the statue with the coral should be in the middle, and the statue with the chain should be high. The statue with the conch shell should be on a platform above and across from you.
Shoot it when all the statues are positioned properly and more water will flow in.
Swim up to the platform with the conch shell statue and you’ll have to fight some coral skeletons. Continue traveling upwards and you’ll come across makeshift bridges made out of giant bones and broken ship masts as well as a Sunken Merfolk Statue that you can use to store any treasure you’ve found so far. At the top, you’ll see a Kraken jawbone that has a Siren Window inside. Shoot the blinking coral above it to open it. Be sure to fill up your ammo at the ammo chest that’s right next to this entrance.
Go through the Siren Window and you’ll swim up to another Siren Window. Be careful, as the area behind that will be teeming with more hungry sharks. Kill them and you’ll now be able to steal all the treasure in this room without fear of being chomped to death.
Shrine Of Hungering Journal Locations
Now that you’ve gotten your treasure and loaded up on shark meat, let’s find those journals. Here’s where you can read all of the journals hidden around The Shrine Of Hungering.
Journal 1: Shrine Of Hungering

Not too long after entering the shrine and having your first encounter with sharks, you’ll find this skeleton lying on the ocean floor. Under his hand will be the first journal.
Journal 2: The Warrior

This journal is found after you solve the first statue puzzle and then use the geyser to boost up to the next area. On the platform you land on, you’ll find a broken rowboat. Inside that and next to the ammo chest, you’ll find the second journal.
Journal 3: The Warrior – Unmasked

After the second statue puzzle is solved, you’ll head up and over a broken ship mast. There will be a geyser on the wall that can blast you sideways. Move past that and you’ll see a pile of discarded wooden planks lying on the ground. Next to these planks is the journal.
Journal 4: The High Priest

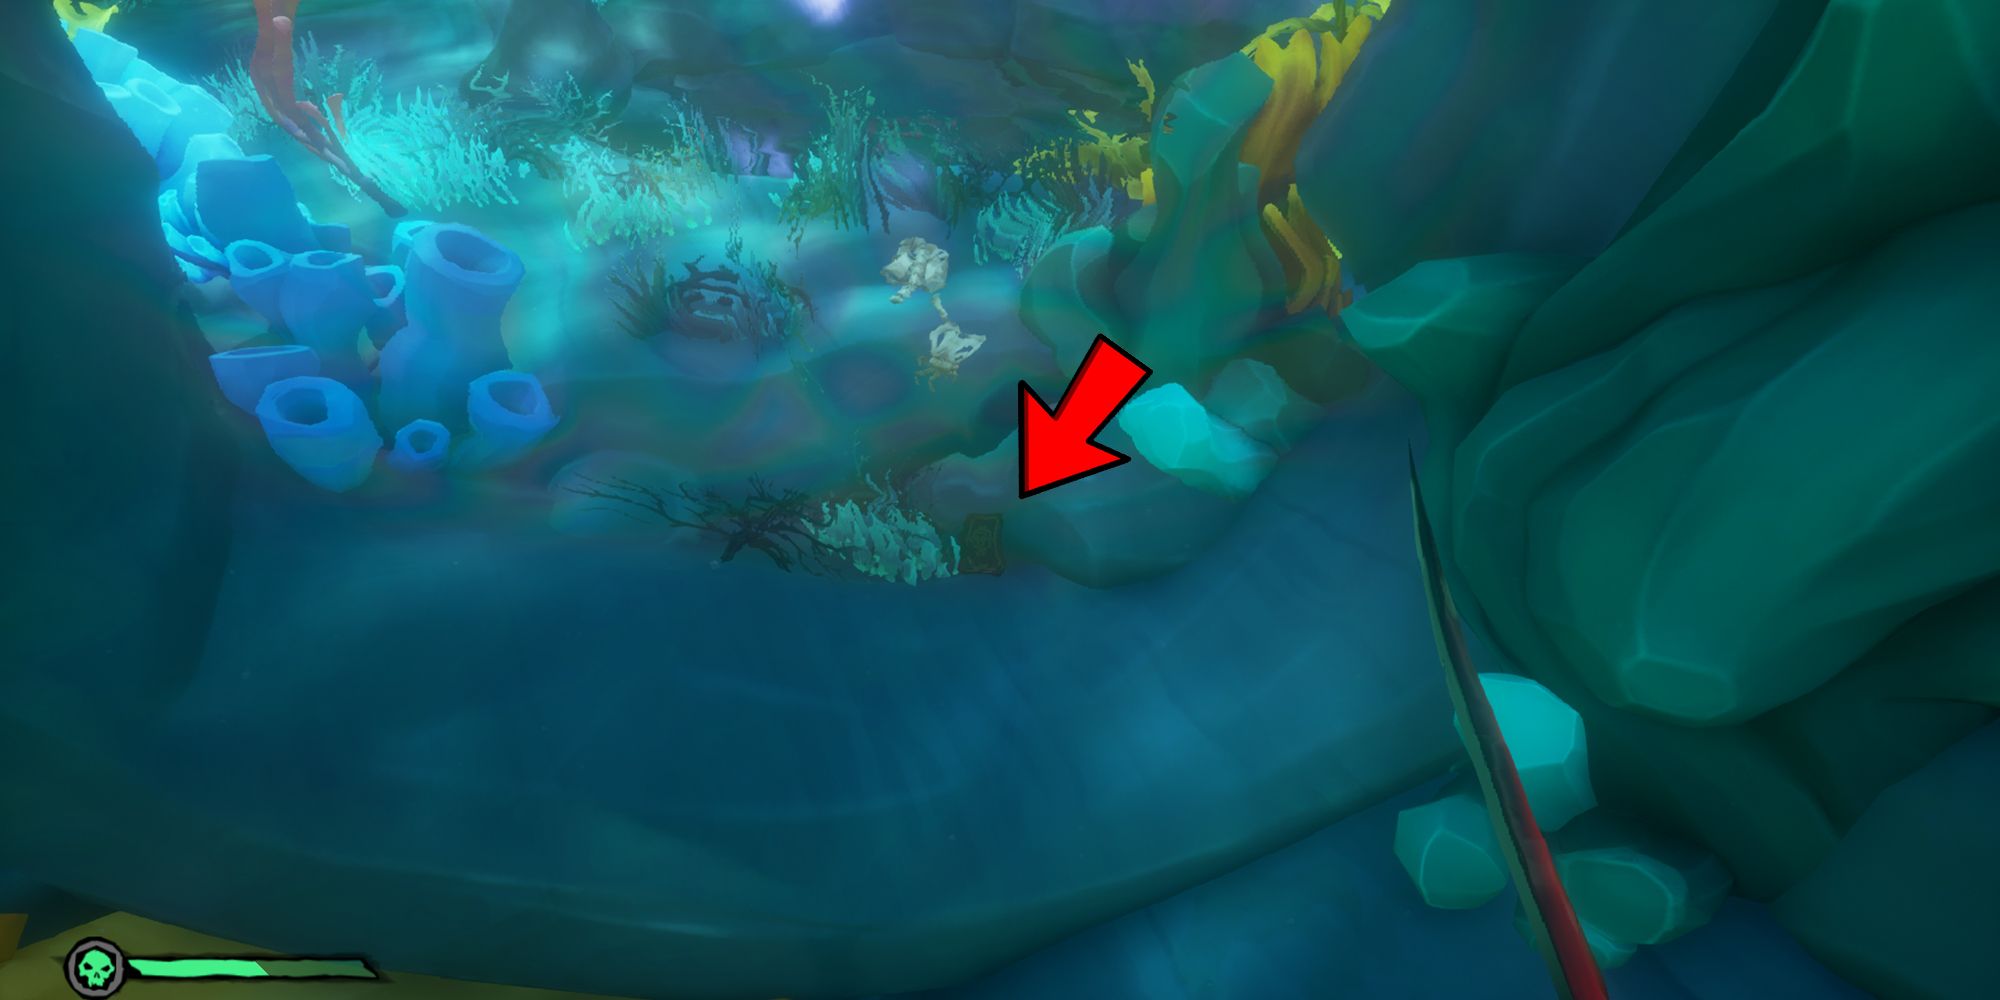
This one is very well hidden. To the right of the Kraken jawbone with the Siren Window inside, you’ll see some bones jutting out of the wall that you can use as platforms. Jump across them and you’ll reach an area with extra treasure and a Siren statue with glowing red eyes. On the left side below this red-eyed statue, you’ll find the journal underneath some weeds.
Journal 5: A Great Evil
As you head through the Siren Window in the mouth of the Kraken jawbone, you’ll find this journal right before you go through the second Siren Window. You can spot it by looking for the headless skeleton at the Window’s entrance.
Link Source : https://www.thegamer.com/sea-of-thieves-the-shrine-of-hungering-puzzle-solution-guide/